
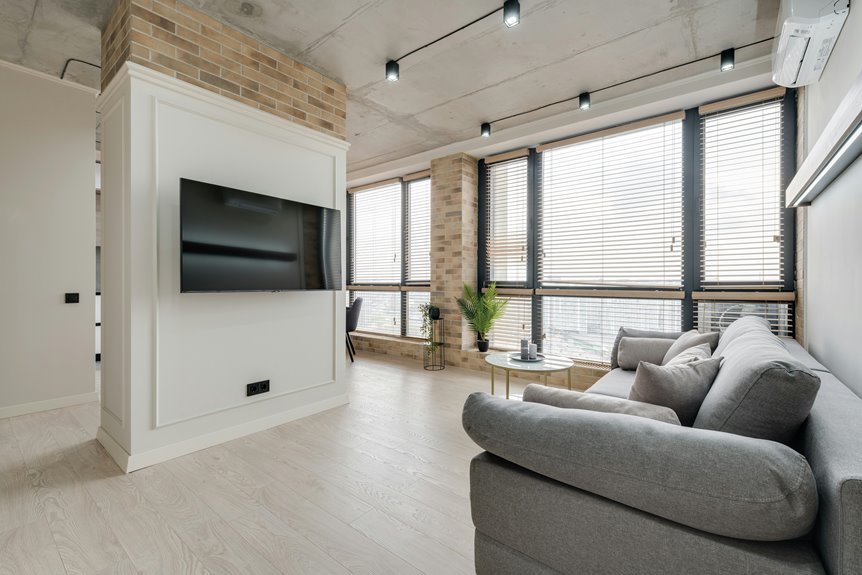
I’ll walk you through inside mount blinds installation—it’s simpler than expected. Grab your tape measure and level, then measure your window width and length at three spots each, using the smallest numbers when ordering. Mark bracket spots 1/8 inch below where the headrail sits, drill pilot holes into studs, and secure brackets firmly. Slide your headrail in, attach the valance for a finished look, add your wand if you’ve got one, then test everything out. Level-check and you’re done—though there’s definitely more technique worth knowing.
Gather Your Measuring and Mounting Tools

Ready to get started? Let’s gather what you’ll need for measuring and mounting your inside mount blinds. Grab a pencil, tape measure, level, and stepladder—these tools support accuracy and keep you safe while working up high. You’ll want two brackets per window (three for larger windows) plus end caps to complete the job. Before heading to the store, check your mounting surfaces. Do they hit wood studs? If not, grab drywall anchors instead. Having everything assembled beforehand means no frustrating trips back and forth. There’s nothing worse than climbing down only to realize you forgot something. With your measuring and mounting essentials ready, you’re prepared to tackle this project with confidence.

Cordless Blinds: Filter out light with the Achim Cordless Light Filtering Mini Blinds. These lightweight, vinyl blinds with no cords to get tangled are child and pet safe. Durable, high quality construction resists warping, fading, and sagging.

【Excellent Material】:Blind Size: 23"W x 72"H, Fabric Size: 22"W x 72"H. Fabric is 100% polyester material fabrics with reinforce thermal insulated coating, feeling soft and smooth. No burrs, strong wear resistance, and easy to clean.Our blackout blinds block 100% of sunlight and UV rays. The thermal backing reduces the loss of room heat and against cold through the windows in winter and summer, helping to reduce your energy bills.
Measure Width and Length at Three Points

Why do we measure in three spots instead of just one? Because windows aren’t always perfectly square. I measure width at the left, middle, and right sides, then use the shortest measurement for ordering. For length, I measure at the top, middle, and bottom—this time using the longest measurement. This three-point measurement approach matters because it prevents your inside mount blinds from sticking or rubbing against the frame. Those tiny gaps can cause operational problems. I grab my pencil and tape measure, jot down each measurement carefully, then hand everything to the associate. They have the expertise to fulfill your order correctly, so your blinds fit properly and operate smoothly for years to come.

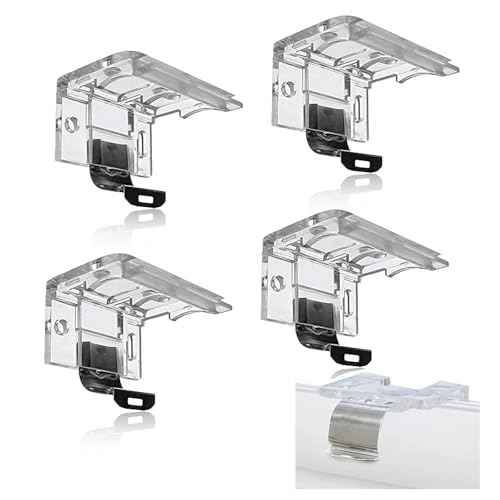
Rich in quantity: you will receive 2 pieces (1 set) blind brackets, each set contains a left and a right mounting bracket, which can be installed on one blind, enough to meet your needs.NOT include mounting screws.
Accurate Sizing and Compatibility: Designed specifically to fit the blind top headrail with a height of 1" (25mm), ensuring a ieal fit for your 1/16" x 1-19/32" x 1-11/16" blinds
Package: A set(2 pieces - a left and a right) of low profile blind mount brackets, NOT INCLUDE any Screws
Use the Smallest Measurements When Ordering
When you’re ordering your inside mount blinds, use the smallest measurements you took. Round them down to the nearest 1/8 inch for both your length and width. Why? Because those smallest numbers prevent your blinds from sticking inside the window frame. You’ll get smooth, consistent top-to-bottom movement every single time you open and close them. Think of it like this: if your measurements vary across those three points (top, middle, bottom), the tiniest spot is your limiting factor. Use that one. This ordering size approach keeps everything working properly. Grab Home Depot’s measurement handout to nail your numbers, and you’re set.

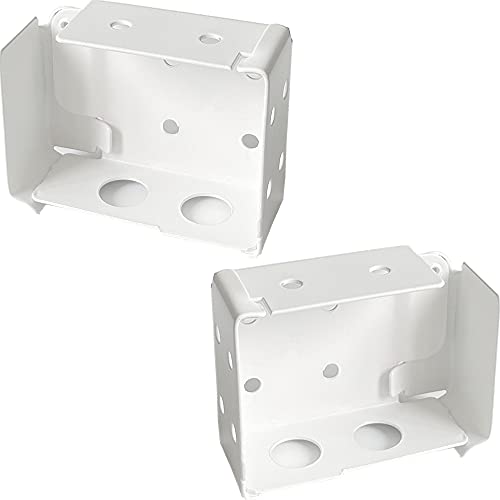
Package: 2pcs Center Support Brackets For Low profile Window Blinds 2inch.

Cordless & Child-Safe Design. Modern cordless lift removes dangling cords for a safer, cleaner look in homes with children and pets. Easily raise or lower by hand for smooth, quiet operation.

Curtain rods for 66 to 120-- simple in structure, very easy to install or remove, bring much convenience to you.
Mark Brackets 1/8 Below the Headrail on Each Side

Now here’s where precision really matters—you’ll want to grab your pencil and mark exactly 1/8 inch below the headrail on both sides, and I know that sounds tiny, but that small offset is what keeps everything level and prevents your shade from catching on the window frame when it moves. This measurement placement might seem fussy (no, really, it makes a significant difference), yet getting both side positions marked accurately keeps your headrail sitting properly and your lift mechanism operating smoothly without any annoying friction. Think of it as setting up the foundation for the whole installation—nail this alignment technique now, and you’ll avoid frustrating adjustments later.

CHECK BEFORE ORDER: High-quality samples, they allow you to assess the quality & texture of fabric and then decide on the perfect one for your home; The introduction to each fabric serie help you know them better

【Important Note】This item only includes light filtering roller shades fabric samples of all series. A complete blind is not included. It is recommended to purchase fabric samples before customizing your smart blinds to make sure you order what you like

Precise Measurement Placement
When you’re ready to secure your blinds, getting those bracket marks in exactly the right spot is important—and it’s easier than you’d think. I start by measuring 1/8 inch below where my headrail will sit, then mark both sides of the window frame with a pencil. This tiny offset prevents rubbing and keeps everything operating smoothly. The key is making small, precise marks on the rim at your intended bracket placement locations. I always double-check that both marks are level and aligned before drilling—no, really, it only takes a moment. When your measurement placement is accurate, your inside mount installation stays perfectly squared, and you’ll avoid frustrating adjustments later. Those few careful seconds now prevent real headaches down the road.
Marking Both Side Positions
Where exactly should those bracket marks go? I’m glad you asked, because getting this right makes everything easier.
Here’s my marking strategy for inside mount bracket placement:
- Measure 1/8 inch below the headrail on the left side
- Make the same 1/8 inch measurement on the right side
- Align both marks with your window frame’s rim
- Double-check that both marks are perfectly level with each other
That small 1/8 inch offset? It provides a practical advantage. It gives your headrail just enough clearance so it won’t stick when you install it. I use a level to verify both side marks match up perfectly before touching the drill. Symmetrical bracket placement keeps everything balanced and looking professional. Once you’ve got those marks down, you’re ready for pilot holes.
Headrail Alignment Technique
Before you grab your drill, you’ll want to nail down your bracket positions with laser precision—and I’m not exaggerating. I mark my brackets exactly 1/8 inch below the headrail on each side, and this small detail changes everything. You see, this tiny offset prevents your shade from rubbing against the frame when you raise or lower it, keeping operations smooth and trouble-free.
Here’s what I track when aligning my brackets:
| Step | Action | Result |
|---|---|---|
| 1 | Measure 1/8″ below headrail | Prevents interference |
| 2 | Mark both sides equally | Creates level installation |
| 3 | Verify alignment marks | Confirms straight fit |
| 4 | Double-check measurements | Validates accuracy |
| 5 | Mark reference points | Ready for drilling |
I align both side marks at the same vertical level—no guessing allowed. This headrail alignment technique produces inside mount blinds that fit properly, level and secure every single time.
Drill Pilot Holes and Anchor Brackets to Wood Studs

Now I’ll drill pilot holes using a 1/8 inch bit at each marked bracket location, which prevents the wood from splitting and gives your screws a straight path to follow. You’ll want to find those wood studs behind your window frame—they’re essential for a solid installation, so I always verify I’m drilling into solid wood rather than drywall alone. Once those pilot holes are ready, I’ll secure each bracket with two screws, tightening them firmly until there’s no wiggle room, because a wobbly bracket means wobbly blinds.

MULTIPLE SIZE OPTIONS – This toggle bolt assortment includes 3 sizes (1/8 in, 3/16 in, 1/4 in) to help you choose the appropriate size for drywall anchor applications based on wall type and intended use. Suitable for selected hanging projects such as hanging pictures, curtain rods, and plants when used correctly. Please refer to the size chart and installation guidance before use.

Featuring a ribbed drywall anchor design, the anchors grip firmly into the wall, preventing spinning or shifting during installation. A clean, frustration-free solution for wall anchors for drywall projects. As the screw anchors are tightened, the split body expands for increased surface contact. This unique feature boosts holding power in hollow drywall, ensuring items remain stable over time.

For medium-duty wall applications such as installing shelving, mirrors, picture frames, and more
Pilot Hole Placement Technique
How do you keep those brackets from slipping or wobbling once you’ve mounted them? I’ll walk you through my technique:
- Mark each hole with a pencil, aligning with studs whenever possible
- Drill pilot holes using a 1/8 inch bit for clean entry points
- Install wood anchors if screws won’t reach studs, keeping them flush
- Drive screws firmly until mounting brackets sit secure and tight
Pilot holes are your best friend. They prevent wood splitting and give your screws a straight path, making installation smoother. I space my brackets evenly, typically two per window, for balanced support of your shade. When anchors are needed, flush installation matters because protruding anchors create gaps. The result? Brackets that stay put with no wobbling and no frustration—just smooth-operating blinds that work as intended.
Securing to Wood Studs
Once you’ve located your wood studs with a stud finder, you’re ready to secure those brackets firmly in place. I drill my pilot holes using a 1/8-inch bit, which marks my screw placements precisely before I attach anything. Wood studs provide strong holding power for inside mount blinds that prevents sagging over time. I position my brackets directly over those studs, then drive wood screws through the pilot holes. This approach locks everything in place securely. After I’ve anchored both brackets, I verify they’re level and properly aligned. When your brackets sit solidly on studs, your window shade operates smoothly and remains stable for years.
Insert the Headrail Into the Brackets

Before you slide that headrail into place, you’ll want to lift up the swivel covers on your installation brackets—and don’t forget about any auxiliary brackets you might have, since they need the same treatment. Now comes the next part:
- Align the headrail carefully with each bracket opening
- Check that your lift, tilt, and raise/lower mechanisms line up properly
- Slide the headrail in smoothly until it’s fully seated
- Close those swivel covers down to lock everything firmly
Once you’ve got it installed, your blinds are secure. Check for gaps between the headrail and brackets—they shouldn’t exist. Test your lift and tilt functions; they should glide smoothly. You’ve completed this installation step.

【Excellent Material】Made of imported 100% Polyester. Light filtering, good ventilation, anti-static, dust-proof and durable. Dual-layer fabric for daylight filtering and full night privacy.

How to Order Inside Mount: Each cellular shade is produced at the exact size you order. For an inside mount, order the shade width 1/4" to 1/2" narrower than the window opening width. IMPORTANT: This shade fits windows measuring 35-1/4" to 35-1/2" wide for inside mount.
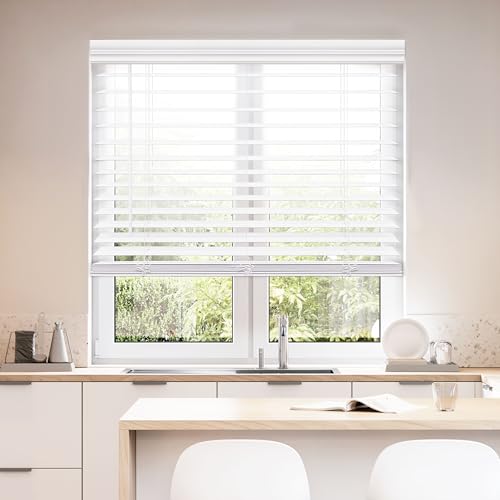
All blinds are manufactured with a standard 1/2" width deduction to allow for proper installation clearance. The actual blind width will always be 1/2" narrower than the selected size, regardless of whether you choose an inside or outside mount.
Attach the Valance to Finish Your Blinds

The valance is what makes your blinds look polished and finished—it hides that bulky headrail and gives everything a neat, orderly appearance. Now here’s where your blind type matters, because wood and metal blinds attach differently.
If you’ve got wood blinds, you’re in luck—the valance uses magnets to connect. Just hold it up to the headrail, align it carefully, and those magnets’ll snap into place automatically. No fussing around, really.
For metal blinds, you’ll attach valance clips to your headrail first, then slide that valance slat up into the clips from bottom to top. Make sure everything sits flush and aligned properly so you get that professional finish you’re after. You’re almost done.

Note:Make sure it fits your blind – check size/shape in images and compare with your brackets.

Note:Make sure it fits your blind – check size/shape in images and compare with your brackets.
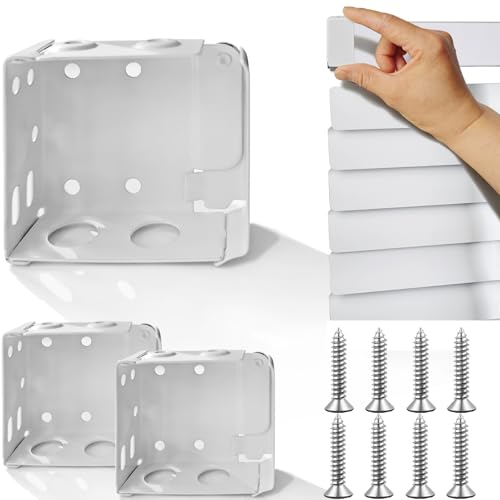
✅【Package Include】: Set of 2 mini blind brackets (two brackets as a set, a Left bracket and a right one, with 8 screws)
Add the Wand for Cordless Tilt Operation (If Included)
If your blinds came with a wand for cordless tilt operation, you’re about to add the final piece that makes adjusting your slats super easy—no, really, it’s that simple. Here’s how to complete your wand installation for inside mount blinds:
- Thread the wand onto the wand hook carefully
- Lower the sleeve down to trap the wand securely in place
- Test the tilt operation to verify smooth, comfortable movement
- Check that nothing interferes with the headrail or fabric
Once installed, your cordless tilt wand gives you one-handed control to adjust those slats while your shade stays exactly where you want it. If your model doesn’t include a wand, no worries—just skip this step and move forward.

Range of Applications: white blind replacement wand is of good workmanship, it is smooth on the surface, and the hooks can easily be applied to Most kinds of windows, such as cordless blinds, honeycomb blinds and rolled shades.

✔【PACKAGING INCLUDES】: You will get 24 pcs vertical blinds replacement stems and gears (include 12pcs Stems and 12pcs Gears), sufficient quantity to meet your replacement requirements, you can also share them with your friends and family.

【Light Control & Privacy】Compared to traditional roller or venetian blinds, zebra blinds feature alternating sheer and privacy bands for customizable light control. Filter harsh sunlight while maintaining your view, or overlap bands for enhanced privacy and room darkening.
Test Tilt, Lift, and Raise/Lower Functions

Now that your wand’s locked and loaded, you’re ready for the moment of truth—making sure everything actually works the way it should. Gently tilt the wand back and forth, watching those slats move smoothly without any binding or resistance. Next, test the lift mechanism by raising and lowering your shade from top to bottom, checking that the headrail stays put and doesn’t wobble around. You want balanced, even movement on both sides—no stuttering or sticking at the window edges. If something feels off, pause and double-check your bracket alignment. Sometimes a small headrail adjustment or bracket repositioning improves the difference between a frustrating installation and one you’ll actually feel proud about.

【Material】Enjoy a collection of 20 colors in 100% blackout polyester fabrics, perfect for creating your ideal blackout shades

[Light Filtering Design] Effectively blocking the interstitial light from blinds and shades, provides a good shading effect and compensates for the shortcomings of the blinds design, creating a quieter and better quality sleeping and privacy protection environment for you

Motorized Cellular Shades with Remote: Smart cellular blinds can regulate the incoming natural daylight and sunlight to control the indoor climate and save energy, by taking full advantage of the reflective and insulating properties, creating perfect atmosphere at any time of the day.
Verify Your Blinds Are Level and Operating Smoothly

Grab your level and get ready to check your handiwork, because this step determines if everything’s sitting just right. You’re almost there, and this is where you confirm your inside-mount installation works properly.
Here’s what you’ll verify:
- Place your level against the headrail on both sides, checking that it’s perfectly horizontal
- Lower and raise the shade several times, watching for smooth operation without binding
- Check that the shade moves freely from top to bottom without catching anywhere
- Confirm the top edge sits flush with your window opening, with no gaps
Perform a full cycle a few more times. Notice how consistent everything feels? That’s the sign you’ve completed this installation correctly. Your blinds are ready to function well for years to come.

TOGGLER SNAPTOGGLE Drywall Anchor – 1/4"-20 UNC Zinc-Plated Snaptoggle Anchors – Holds 265 lbs on Drywall, 802 lbs on Concrete Block – Toggle Bolts for Mounting Cabinets and TV – 20 Pack (With Bolts)

What you receive: 6 pieces (3 sets) blind brackets in white, each set has left and right mounting bracket, which can be installed in blind stand, the quantity is enough to meet your needs
ANTI-SPIN GRIP FOR A SECURE HOLD Designed to grip firmly into drywall and help reduce spinning during installation for a more reliable and frustration-free hold.


