
First, I’ll grab my screwdriver and clear the area around my window.
Then I’ll raise the blinds fully, remove that valence cover, and detach any safety clips or cord holders—these matter for safety.
Next, I’ll support the headrail firmly with both hands and slide it out of the brackets slowly.
After unscrewing the wall brackets themselves, I’ll wipe everything down and inspect for damage.
Once I’ve decided on storage or disposal, I’m all set, though there’s definitely more to know about each step.
Gather Tools and Clear Your Space
Before you start unclipping anything, gather a flat-head or Phillips screwdriver (or a drill with the right bit), a five-in-one tool, and a sturdy ladder or step stool so you can safely reach the headrail and mounting hardware without stretching yourself thin. Next, clear the area around your window by moving curtains aside and removing any valence or decorative pieces that might get in your way. This gives you a clean workspace and reveals the top hardware you’ll need to access.
Take a moment to inspect where those end clips and mounting brackets are located—you’re mapping out your approach. Raising the blinds fully exposes everything nicely, making your job easier. Remember, keeping one hand ready to support the headrail during the unclipping process prevents accidents and keeps your safety clip intact.

This blinds duster is made of high quality sturdy polyethylene, sturdy and durable. 8.5 inches length great for clean your window blinds, air conditioner blind, car blinds and works well with cleaner.

Thoughtful Matching Cleaning Tools: 2 pieces of 7 fingers dust cleaner to remove large areas of dust efficiently and quickly,2 pieces mini vent cleaner does not miss the opportunity to clean any corner,double-headed design,suitable for blind angle and small products,you can choose to use according to your needs

Identify Your Blind Type

Now that you’ve got your tools ready and your workspace clear, let’s figure out what you’re actually working with—because blinds aren’t all created equal, and taking down a roller blind is nothing like wrestling with vertical blinds.
| Blind Type | Key Features | Removal Focus |
|---|---|---|
| Horizontal | Valence, end clips, headrail | Release clips first |
| Vertical | Vane carriers, vane clips | Detach carriers |
| Roller | Safety clip, bracket clamp | Unlock side disk |
| Roman/Cellular | Brackets, headrail | Tilt and pull |
Identifying your blind type is the biggest hurdle. Look at your headrail structure, check for vane carriers or end clips, and notice how your blinds operate. Once you determine whether you’ve got horizontal, vertical, roller, or Roman blinds, the removal sequence becomes straightforward. Each type has its own rhythm and specific brackets you’ll encounter, making the whole process click into place.

Package: 2pcs Center Support Brackets For Low profile Window Blinds 2inch.
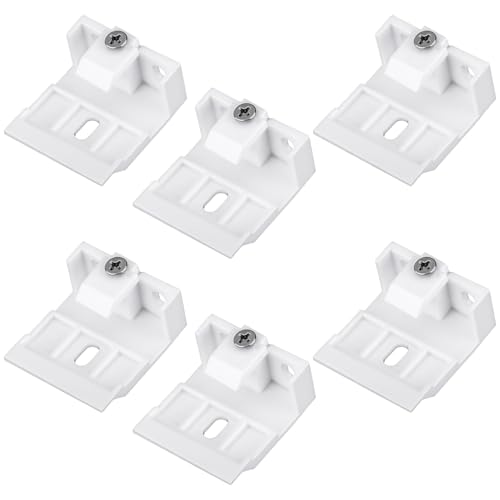
Mount Bracket Holder Set: enjoy a complete set of 6 mount bracket holders, thoughtfully packaged to cater to your shade installation or repair needs; Ideal for an array of applications, this set is suitable for securing blinds and wide beam folding blinds, along with roped honeycomb shades or folded tones

Package: 2pcs Center Support Brackets For Window Blinds 1"x1"(25x25mm) Headrail.
Raise Your Blinds or Slats

I’ll start by raising my blinds all the way to the top, which sounds simple but does help—it exposes that headrail I’ll need to access and keeps the slats from getting caught on anything as I work. This step also takes a lot of strain off my arms and prevents damage, since I’m not fighting against a bunch of loose material hanging down. Once everything’s up and out of the way, I’m in a much better position to actually remove the blinds without any surprises.

✔️ 60 Pieces - There are 60 Pieces 1.18inch*1.18inch Vertical Blind Repair Tabs in the package. So you have a sufficient number of Verticle Blinds Snap in Replacement to fix all the Vertical blinds in your home.

【Durable and Strong】: These white vertical blind repair vane savers are made of high-quality metal, durable and strong. Strong gripping force can effectively repair the top broken vertical blind slats and will not lose its effect due to temperature.

Enough quantity: you will get 40 pieces of vertical window blinds, sufficient quantity to meet your requirements, suitable for your window blind or valance installation, bringing you much convenience
Maximize Headrail Access
What’s the best way to get a clear view of all that hardware hiding up there? I’ll walk you through maximizing headrail access so you can tackle this project confidently.
Here’s what I do:
- Pull your blinds all the way up to fully expose that headrail and its mounting hardware
- Remove the valence by detaching it from its clip—this gives you the clearest view of everything
- Keep one hand steadying the blind while you work, preventing any drops or damage
With the valence removed, I can now see exactly where those end clips sit on the blind face. I grab my five-in-one tool or flat-head screwdriver, position it carefully, and I’m ready for headrail exposure. This preparation makes the entire removal process smoother and safer for you and your blinds.
Prevent Strain or Damage
Before you start yanking on that headrail, here’s the thing—you’ve got to raise those blinds all the way up, and I mean completely up, to give yourself some real working room. When you lift them high, you’re clearing out any tangled cords or fabric that could catch when you remove brackets from the window frame. Keep a solid grip on that headrail while you prep—no, really, this matters. Don’t overextend it beyond the top; that’s how you stress the mounting hardware and headrail itself. Once everything’s clear, you can slowly slide the headrail out of the brackets with one hand supporting the whole thing. This gentle approach prevents sudden drops and keeps your blinds safe until you fully detach them from your window.
Remove the Valence Cover

Now that your blinds are raised, you’ll need to locate and remove the valence cover—that decorative piece sitting at the top of your blinds—which means finding the clips holding it to the headrail and gently detaching it without causing any damage. I’m going to walk you through locating this cover and safely wiggling it free, keeping one hand steadying your blinds the whole time so nothing comes crashing down on you (no, really, that matters). If your valence has multiple clips holding it in place, you’ll want to release each one evenly to avoid any warping or cracking, then slide the whole thing out to expose what’s underneath.

★【Basic Information】The Bungee Kit is a universal replacement for outdoor/indoor sun shades and roller blinds, it can prevent the rolling curtain from blowing away.

This product is ideally suited for the majority of outdoor roller blinds and sunshades. It is designed to convert wired outdoor roller blinds into cordless models or to replace broken brackets, enhancing functionality and convenience.
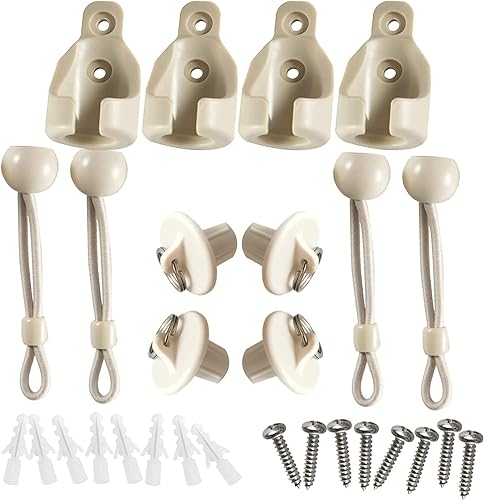
★【Basic Information】The Bungee Kit is a universal replacement for outdoor/indoor sun shades and roller blinds, it can prevent the rolling curtain from blowing away.
Locating The Valence Cover
At the very top of your blinds, you’ll spot a decorative cover called a valence—that’s the piece hiding all the hardware and headrail underneath. Finding it is straightforward.
Here’s what you’re looking for:
- A horizontal strip of fabric or plastic sitting right above your blind slats
- A cover that matches or complements your window treatment’s color and style
- The component concealing the mounting hardware and clips that hold everything together
Once you’ve identified your valence, take a moment to examine how it attaches. You’ll notice it clips onto the headrail using small fasteners. This decorative cover protects that headrail while keeping your setup looking neat and organized. Understanding how it’s positioned helps you detach it safely without accidentally damaging your blinds during removal.
Detaching The Valence Safely
Ready to remove that valence? First, gently detach it from its clip on the headrail—use steady pressure without yanking. If it’s decorative, wiggle and slide it carefully while supporting the headrail with your other hand. This prevents brittle damage that could compromise your removal process.
Next, check for any remaining screws or fasteners hidden behind the valence. Catching these now prevents frustration later. Once you’ve removed everything, set the valence aside in a safe spot where it won’t get damaged during the rest of your blind removal project.
This straightforward approach keeps brackets intact and allows for smooth reinstallation.
Remove Safety Clips and Cord Holders

Before you can fully detach those blinds, have you noticed those little clips or cord holders hanging around? Yeah, they’re safety features, and they need your attention before you proceed further.
Before detaching blinds, locate and remove safety clips and cord holders—these essential safety features require careful attention first.
Here’s what I’m doing:
- Locating all safety clips and cord tensioners attached to my wall mounts
- Detaching the cord tensioner carefully to free up that pull cord
- Removing any child safety clip by unscrewing its fastener with my screwdriver
Once I’ve tackled these components, I’m also unscrewing the mounting brackets themselves. This prevents any leftover hazards lurking around. I’m setting everything aside in one secure spot, no mixing things up. Keeping these pieces together makes reinstallation way easier later.

Note: Valance clip compatibility depends on both the size and shape of your vertical blind headrail. Please check the product images for details.

【What You Will Get】Package contains 10 pieces of 1-7/8 inch levolor blinds for windows.

Package: One Pull Ring and one screws
Unlock and Release the End Brackets

Now comes the part where those end clips finally give up their grip—and honestly, it’s easier than you’d think. I locate the two end clips on the blinds face, grab my five-in-one tool or flat screwdriver, and rotate both clips outward and upward simultaneously. Here’s the thing: I maintain a secure grip on the blind itself while releasing the clips, preventing any dramatic dropping or swinging that’d startle me (and possibly damage my wall). After disengaging the end clips, I carefully slide the blind toward myself, keeping the headrail aligned perfectly with the brackets. Before fully detaching anything, I verify no remaining screws or fasteners hold those end brackets in place—because discovering one later would be frustrating. A protective cloth on the wall keeps everything safe throughout this process.

High Quality: Blinds duster is made of high quality sturdy polyethylene, sturdy and durable. Great for cleaning your blinds.

【Package Include】4 pack 15 inch microfiber duster, 4 colour, blue, green,orange,purple.

【Multifunctional Repair Tool】Designed specifically for disassembling car window handles, it can easily be inserted and removed from the car interior handles, avoiding excessive force that may damage parts and reducing secondary damage during the repair process. It is an ideal choice for auto mechanics and DIY enthusiasts.
Support and Slide the Headrail Out

How do you move something heavy without dropping it on your foot? Follow these steps:
- Grip the headrail firmly with both hands while the brackets stay open
- Raise your blinds all the way up to give yourself working room
- Slowly slide the headrail away from the wall, keeping it steady
Support is important. Once you’ve released any clips holding that headrail in place, you’re ready for the actual removal. Don’t rush it. With both hands supporting the weight, gently slide it out of the brackets. Move it away from the wall at a controlled pace—patience here prevents accidents.
Once it’s free, place that headrail on the floor or something soft. Manage those control cords so they don’t tangle or get damaged during this process.

Package: 2pcs Center Support Brackets For Window Blinds Headrail measured apx 1-7/16" x 1-5/8"(37*41mm).

Note:Make sure it fits your blind – check size/shape in images and compare with your brackets.

SPECIFICALLY FOR 2" x 2 1/4" HEADRAILS: Designed by Amazing Drapery Hardware, these brackets are ideal for wood, faux wood, and Venetian blinds with 2" x 2 1/4" headrails. Approx. 2 x 2.25 inch / 5.5 x 6.3 cm.
Unscrew and Remove Wall Brackets

What’s holding those brackets to your wall? Screws, of course! Grab your Phillips-head screwdriver or drill, and let’s get those wall brackets loose. You’ll want to turn counterclockwise—that’s lefty-loosey, remember?—until the fasteners come free. While you’re unscrewing, support that headrail so it doesn’t come crashing down. Once the screws are out, gently pull the brackets away from the wall. Now, decide what you’re doing with these brackets. If you’re reusing your blinds, leave them in place and store those screws somewhere safe—a small bag works great. If you’re removing them entirely, go ahead and take them down completely. Either way, check for any remaining fasteners hiding near the window frame.

Sufficient Quantity and Shareable: these vertical blind repair parts come in a set of 2 and are plentiful to meet your daily use and blind accessory replacement needs; Generous packages allow you to share this practical solution with your friends and family; These blind repair controls do not have extended range

Universal Fit: Direct replacement for Graber and Bali G85 Dura-Vue and Duralite headrails and G71 Super-Vue and Everglide headrails. Will also fit many other vertical blind brands. Please check dimensions for proper fit.

Repair your broken vertical blind vanes
Wipe Down and Inspect Your Blinds

With those brackets finally off the wall, you’ve cleared the way for the next step. Before you do anything else, take a moment to give your blinds attention. Here’s what to do:
- Wipe down the slats with a soft cloth to remove dust and debris before handling
- Inspect the headrail and brackets carefully for wear, loose screws, or missing clips
- Check the chains, cords, and safety devices for fraying or tension issues
Cleaning first prevents dust clouds during removal, and inspecting catches problems early. You’ll spot loose screws or damaged brackets that might cause issues later. Plus, detaching any safety devices now keeps everything secure. This prep work makes reassembly smoother, and you’ll know exactly what you’re working with.

【Extensive compatibility】 The cordless crank kits are replacement parts for sunshade curtains, compatible with a wide range of different outdoor sunshade

【Extensive compatibility】 The cordless crank kits are replacement parts for sunshade curtains, compatible with a wide range of different outdoor sunshade models. especially for Coolaroo outdoor roller shade.

Universal Mounting Bracket for Sunshade and Sunshade Roller Shutter
Choose Storage, Donation, or Disposal

Now that your blinds are off the wall and cleaned up, you’ve got to decide what happens next—and honestly, you’ve got three solid options. If you’re planning to reinstall them later, store your blinds in a clean, dry place, protecting them from dust and moisture. Label your boxes so reassembly becomes way easier down the road. Got blinds in great condition but don’t need them? Donation works perfectly if all hardware, brackets, headrail, and screws are included. Finally, if they’re beyond saving, separate the components—slats, cords, metal brackets—and check your local guidelines for proper disposal or recycling options. No matter which route you choose, you’re making a thoughtful decision that respects both your space and the environment.


