
Building your own ceramic kiln? Start by prepping a level concrete foundation with proper clearances—12 to 18 inches from walls, 36 from anything flammable. Then frame it with steel, managing thermal expansion so bricks don’t crack. Layer your insulation strategically, install fire clay joints instead of mortar, and seal everything with an exterior shell. Finally, cure it slowly and dial in your fuel system. Each step builds on the last, making the whole process far more manageable than anticipated—with plenty more details to master for optimal results.
Step 1: Prepare Your Site and Build a Level Foundation

Ever wonder why some kilns work beautifully while others seem to have constant problems? The foundation is where it starts. Choosing the right spot matters—you’ll want non-combustible flooring like concrete or brick, with at least 12 to 18 inches of clearance from non-combustible walls and 36 inches from anything flammable. This spacing is important for safety and performance.
Next, build a level foundation using concrete pavers or a sturdy stand, checking everything with a spirit level. An even base distributes heat properly and keeps your kiln running smoothly. Before you mount anything, confirm the delivery path fits your kiln’s weight and dimensions. Plan your ventilation setup too—good airflow protects you and your equipment. A stable, prepared site provides the foundation for reliable operation.

What You Will Get: product include 1 white square pottery firing mat, 60 pcs moveable nails. This mat measures approx. 3.9×3.9 inch(10×10 cm), white nail measures 0.78 inch(2cm), allowing to fire 2 pieces craft works at the same time.

Core Functionality: This pottery kiln moveable mat serves as a reliable refractory support pad designed to hold various pottery works securely during firing, enhancing the stability of your ceramic projects without size restrictions

【Comprehensive Set】This kiln stilt set comes equipped with 2 ceramic refractory pads and 120 sturdy support pins, designed to meet diverse firing requirements. Whether you’re a ceramic hobbyist or a professional, this set covers all your firing needs with precision and reliability.
Step 2: Construct a Supportive Frame to Handle Thermal Expansion

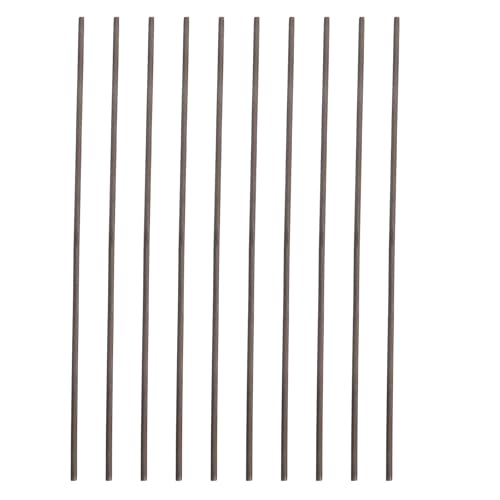
You’ll want to build your frame using steel reinforcement and expansion joints that let your bricks move as they heat up and cool down—kilns shift constantly, so rigid frames crack like old pottery. Create smart spacing at brick joints, use high-temperature fasteners rated for thermal cycling, and design your support structure with adequate clearance for the arching and door adjustments that maintain alignment through intense firing cycles. When you plan for this flexibility from the start, you’ll reduce repair costs and gain better access for maintenance down the road.


Package: includes 300pcs High Temperature Nichrome Wire Jump Rings,with Plastic Storage Box
Steel Wire Reinforcement Methods
Steel wires are integral to kiln construction when managing the temperature fluctuations that occur during firing. High-tensile steel wires are woven through vertical joints in brick courses at regular intervals, creating a reinforced frame that maintains structural integrity. As temperatures increase, bricks expand and shift, but the wire framework prevents gap formation and preserves the kiln’s shape under heat stress. These wires are anchored to fixed points to resist expansion without slipping, and paired with an outer shell that allows the brickwork to move while maintaining consistent tension. After each firing, the wires require inspection and retightening—routine maintenance that sustains the kiln’s structural condition.
Brick Expansion Management Techniques
What happens when you heat up a bunch of bricks all at once? They expand, friend. That’s why I build my kiln with a flexible metal frame that lets those bricks move without fighting back. I intentionally space my brick courses with expansion joints—think of them as tiny breathing room—so thermal stress doesn’t crack everything apart.
Here’s the thing: I use fire clay mortar sparingly, almost loosely, which lets each brick shift independently during firing. No rigid bonding means no disaster when heat waves through. I’ve also planned my arch and door spacing carefully, accounting for how much those bricks’ll grow on all sides.
Dynamic tolerances aren’t just technical specifications—they’re my insurance policy against multiple firings ruining my kiln’s structure.
Frame Stability and Security
The frame around your kiln is basically its skeleton—it’s what keeps everything from falling apart when heat starts doing its thing. I’ve learned that metal frames with expansion joints work well. They let bricks shift without cracking, which saves you from constant repairs.
| Component | Purpose |
|---|---|
| Steel wires | Maintain frame alignment |
| Expansion joints | Allow brick movement |
| Heat-resistant connectors | Prevent deterioration |
| Non-combustible base | Secure anchoring |
| Access points | Enable maintenance |
You’ll want heat-resistant connectors because regular ones fuse together at high temperatures, ruining everything. I anchor mine firmly to my foundation and walls, but I’ve built in disassembly points for cleaning and adjustments. Planning accessibility upfront means you won’t have difficulty when you’re trying to stoke the fire or clear ash.
Step 3: Design Your Kiln’s Arch and Plan the Door Opening

Now we’re getting to the important part—designing your arch, which is where your kiln really starts to look like a kiln. You’ll want to size that arch opening to match your kiln door perfectly, keeping the flame moving smoothly through the chamber while preventing cracks from all that heat expansion (an arch former that drops out afterward makes placement easier). Planning your door opening and how you’ll support everything underneath requires thinking about stress distribution, because a well-designed arch that minimizes horizontal pressure is what keeps your kiln standing strong for years to come.

8 OZ TUB CEMENT – High-strength gray sodium-silicate-based compound formulated for repairing, sealing, and bonding in high-heat environments such as furnaces, stoves, and fireboxes.

Comes in Gray, Buff and Black

The information below is per-pack only
Arch Design and Construction
Because your kiln’s arch is basically its heart—the main tunnel that’ll guide all those hot gases around your pots and up through the back flue—you’ve got to get this part right, and that’s where things get interesting. I build my arch using a removable former that drops out after the brickwork sets, which means no permanent supports cluttering things up. The key to solid arch design is matching it perfectly with your door opening, keeping those flames flowing smoothly without any shortcuts through gaps. I’ve learned from Czech kiln practices that mirror the interior arch, minimizing stress on bricks during firing. This approach means your kiln’s heart beats evenly, distributing heat where it matters most.
Door Opening Specifications
How wide should your door opening be, exactly? Your opening must align perfectly with your arch design, no, really. I’ve learned that matching these two elements minimizes stress on the bricks while keeping flames flowing smoothly inside. You’ll want enough clearance for loading your ceramic pieces—nobody enjoys squeezing work through a tiny gap—plus space for air and flame movement.
Here’s what matters: account for firebrick thickness and leave those 1–2 mm mortar-free joints using fire clay. This small breathing room prevents cracks from forming. Balance is everything; your opening needs to be wide enough for easy stoking but tight enough to seal heat effectively and prevent embers from escaping. Do this correctly, and you’ll have a kiln that works beautifully.
Structural Support Planning
Once you’ve got your door opening sorted out, you’re ready to tackle the backbone of your whole operation—the arch and its support system. This is where things get real interesting because your arch design literally holds everything together.
| Support Element | Purpose | Material |
|---|---|---|
| Metal Frame | Accommodates expansion | Steel bands |
| Fire Brick | Arch structure | Refractory clay |
| Soldier Course | Bridges layers | Fire brick |
| Back Wall | Supports arch | Insulating brick |
You’ll build an arch former separately, drop it out later, and use fire clay instead of mortar—this keeps things flexible for repairs. That metal frame around your kiln? It’s your safety net, letting everything expand and contract without cracking. This foundation work prevents problems down the road.
Step 4: Install the Fire Grate and Build Interior Bridge Floors
Why do you think the foundation of your kiln’s interior matters so much? Well, it’s where the actual work happens. Your fire grate is the backbone of everything above it, and getting this right makes future repairs way easier.
I use cylindrical kiln props laid on their sides for my fire grate; they’re replaceable and practical, no fancy metal required. Then comes the interior bridge floors, which I build using one-and-a-half length bricks to span across the fire box. These create that stable pathway where combustion occurs beneath your ceramics.
Here’s my insider tip: use fire clay instead of mortar for interior joints. Seriously, this one choice saves you headaches later when you need to fix something. Fire clay keeps everything flexible and simple.
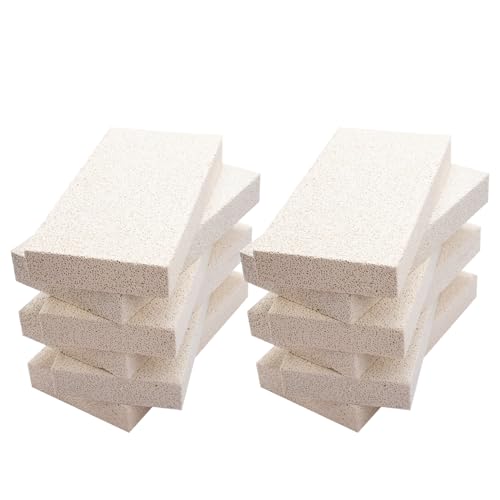
Size: 9" x 4.5" x 1.25", Withstands Up to 2373℉/1301℃, 12 Pieces, Material Composition: Alumina & Silica.

Substantial Built - Insulating firebricks are shaped refractory products belonging to the groups of thermal insulation refractory bricks built with high compressive strength, forge bricks feature a porous structure that enhances insulation performance while ensuring long-term structural durability

Substantial Built - These fire bricks are shaped refractory products that belong to the groups of thermal insulation refractory bricks built with high compressive strength, fireplace bricks feature a porous structure that enhances insulation performance while ensuring long-term structural durability
Step 5: Insulate Your Kiln Interior in Strategic Layers

Now that your fire grate and bridge floors are in place, you’re ready to tackle the part that’ll keep your kiln holding onto all that heat—the insulation layers that act like a protective blanket around your firing chamber. You’ll start with dry insulating fire brick (no, really, the “dry” part matters because it lets your kiln expand without cracking under the heat stress), then add a soldier course bridging layer that spreads the warmth around and gives your arch something solid to rest on. Getting these layers right is what separates a kiln that’ll last you years from one that’ll fall apart after a few firings.

【1700 CFM, 60W High efficiency EC motor】 Engineered with an advanced 60W EC (Electronically Commutated) motor, this 16-inch shutter exhaust fan delivers a massive 1700 CFM airflow at 1700 RPM. It quickly removes excessive heat, moisture, and odors, making it an ideal heavy-duty ventilation fan for greenhouse, warehouse, or large workshop, all while maximizing energy efficiency.

ENHANCED AIR CIRCULATION — Introduces fresh air and supports efficient exhaust flow, ensuring a more balanced and comfortable sauna environment.
Layered Insulation Material Selection
Because your kiln’s interior needs to expand and contract without cracking under intense heat, you’ll want to start your insulation sequence with dry insulating fire brick—no complicated methods needed here, just straightforward protection. These bricks form your foundation layer, allowing controlled expansion that keeps your kiln design intact.
Next, add a soldier course bridging layer (basically bricks standing upright) to maintain structural stability before you tackle the arches and back walls. This middle section matters—it’s the foundation of your insulation strategy.
For exterior insulation, layer ceramic fiber first, then top it with a thin refractory adobe layer for added containment. When brick sizes vary, grog mixed into your mortar adjusts thickness and improves workability. This approach minimizes horizontal stress during firing, keeping your kiln functional and crack-free.
Strategic Heat Retention Design
With your foundation layers firmly in place—those dry insulating bricks and soldier courses doing their job—you’re ready to tackle the heat-saving work that determines your kiln’s performance. I arrange ceramic fibre next, creating an insulation barrier that traps warmth inside where it belongs. Then comes a thin refractory adobe topping—this final layer seals everything together while maintaining heat retention at peak efficiency. I keep intentional 1–2 mm gaps between bricks for natural expansion, using fire clay as my bonding agent instead of rigid mortar. This flexible approach allows your kiln to breathe slightly, preventing cracks while maximizing insulation. The layered strategy creates a heat-retaining structure that delivers the consistent firing results you need.
Step 6: Seal Your Kiln With Fire Clay and Grog Mix

Sealing your kiln properly is what keeps everything from falling apart (literally), and that’s where fire clay and grog come into play. I mix my fire clay to a custard-like consistency—think pancake batter, not peanut butter—then dip each brick before laying them with just a 1–2 mm gap between joints. When I add fine grog to the mix, it adjusts for brick size variations and seriously improves interior stability. This isn’t complicated chemistry; it’s smart building that lets your kiln breathe and flex as temperatures change. When you get this step right, you’re part of a group of builders who understand that details matter. Future repairs become easier, which means less stress later on.

Clay firing tool:small size, compact and delicate, easy for you to carry around the mat has no burr, comfortable grip and does not hurt hands,pottery kiln pad

Package Includes: Each package contains 1pc ceramic refractory pad and 60pcs ceramic refractory nails. Sufficient quantity and the good combination will meet your various ceramic-making requirements and you can also share them with your family members or friends
Step 7: Build Your Exterior Shell With Heat-Resistant Materials

Step 7: Build Your Exterior Shell With Heat-Resistant Materials
Once you’ve sealed everything on the inside, it’s time to wrap your kiln in a protective blanket—and that’s where the exterior shell comes in. You’re building layers here: recycled insulation bricks form your outer wall, then ceramic fibre sits on top, finished with a thin refractory adobe coat. Each layer keeps the heat exactly where you need it.
| Layer | Material | Purpose |
|---|---|---|
| Inner | High-duty fire bricks | Heat resistance |
| Middle | Recycled insulation | Insulation |
| Outer | Ceramic fibre | Protection |
| Top | Adobe finish | Durability |
| Reinforcement | Mesh backing | Structural support |
This heat-resistant exterior shell protects your kiln from damage while keeping temperatures stable. You’ll reinforce everything with mesh and adobe topping, creating a solid barrier that will last for years.
High Temperature Resistance: Constructed from high temperature tungsten wire, this kiln hanging accessory delivers stable performance in extreme heat conditions essential for pottery kiln firing and ceramic jewelry burning wire applications

Temperature range: -50°C to 1300°C ( -58°F to 2372°F) and Overload display alert when input exceeds measurement range pyrometer
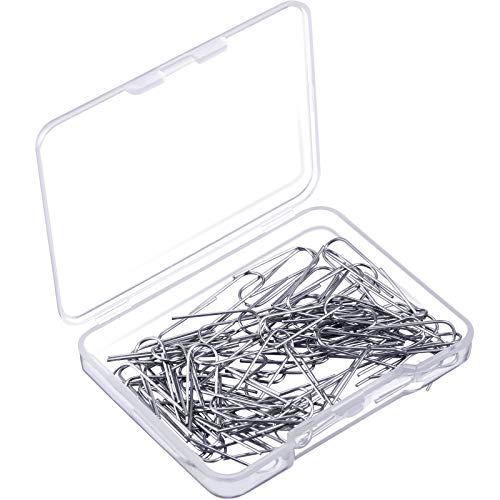
Size: the u-hook size is thick enough to withstand general weight hanging ornaments, the nichrome wire diameter is 21 gauge/ 0.7 mm, u-hook size is 2 x 0.6 cm/ 0.79 x 0.24 inch
Step 8: Cure and Fire Your Kiln for the First Time

Your beautiful exterior shell is now complete, which means you’re ready for the moment that’ll really test everything you’ve built—that first firing. Before you light that flame, though, let me walk you through what’s coming:
- Dry your kiln completely – perform a slow dry-down phase to prevent cracking in the mud structure
- Warm up gradually – start with 30–45 minutes of gentle heat in the firebox, then slowly add wood to reach your target temperature
- Monitor everything carefully – use a thermocouple to track heat, watch your smoke color (white means you’re winning, dark gray means trouble), and manage your damper to control oxygen flow
After firing stops, patience becomes your best friend. Let your kiln cool slowly—no rushing. This protects your ware and keeps your kiln intact.
32 OZ TUB CEMENT – High-strength gray sodium-silicate-based compound formulated for repairing, sealing, and bonding in high-heat environments such as furnaces, stoves, and fireboxes.

16 OZ TUB CEMENT – High-strength gray sodium-silicate-based compound formulated for repairing, sealing, and bonding in high-heat environments such as furnaces, stoves, and fireboxes.
PREMIUM QUALITY - Bring life to your creative ideas with Old Potters sculpting clay! Made in the USA, our organic, nontoxic clay can be used to make different types of artistic masterpieces that look unique and rich. The professional quality of this clay ensures freshness for all types of art works!
Step 9: Diagnose and Fix Common Firing Problems

Even when you’ve done everything right, your first firing might throw you a curveball—and that’s totally normal. If your kiln stalls or temperature plateaus, I’ve learned that checking your oxygen flow is step one. Adjust those dampers to help air circulate better and fuel burn more completely. A thermocouple reading tells you whether you’re dealing with heating issues or insulation problems, so you’ll know what to actually fix. Watch for dark smoke—that’s incomplete combustion talking. Open the damper wider, give it more air, and you’ll see that shift toward clearer smoke. Don’t just crank up fuel hoping it’ll solve everything. Take your time, follow the process methodically, and you’ll dial in your kiln competently.
High Temperature Cement: This is a high temperature refractory cement that is compatible with brick material. Quick Cure: The cement cures in just 24 hours, making it a fast...
Step 10: Choose Your Kiln’s Heat Source and Fuel System

When you’re standing in front of your newly built kiln, one of the biggest decisions you’ll make is what’s actually going to fire it—and I’d recommend starting with propane, even if you’re dreaming of switching to wood eventually. Here’s why this matters for your kiln fuel system:
- Propane lets you troubleshoot easier, catching problems before they get messy
- You’ll control the fire more predictably while learning your kiln’s personality
- Switching to wood later becomes your next step, not your learning curve
The benefit? You’re not locked in. Start simple, master the basics of heat and oxygen flow, then progress. Your kiln’s fuel system grows with you. Having nailed the fundamentals first will serve you well down the road.


