
Your outdoor lighting needs vary wildly by zone—driveways need 1,200 to 2,400 lumens for safety, while pathways work fine with just 100 to 200 lumens per fixture. Trees want 120 to 300 lumens depending on size, accent features need 100 to 120 lumens, and patios pull 100 to 200 lumens per square foot. Steps and edges? Just 12 to 100 lumens keeps things safe without glare. The real trick is balancing all these zones together so you don’t end up with an overwashed yard, and there’s definitely more strategy involved in getting that right.
Zone 1: Driveways and Entryways-Lumen Ranges for Safety

Ever stumble over an invisible step or squint at your own front door after dark? You’re not alone. I’ve learned that proper outdoor lighting addresses safety hazards and creates a welcoming entryway. Here’s what works: aim for 1,200 to 2,400 lumens total illumination for safe navigation. If you want security-focused floodlights, they typically run 700–1,300 lumens, providing broad coverage without harsh glare. Motion-activated lights offer smart efficiency at 300–700 lumens—they activate only when needed. LED fixtures deliver impressive lumen output while using less energy. Consider your driveway’s size and layout when choosing fixtures; this determines how many lumens per light you’ll need. You’ll find that balance between brightness and practicality.

38 W Brightness and Energy Saving: Powered by LED lamp bead as the security light source, enables it to produce up to 4200 lumens at low power of 38 W; With optical designed filter lens, provides better illumination; Save more than 80% electricity bill compared with equivalent traditional lights 175 W

Super Bright & Energy-saving: The 30W Outdoor Motion Sensor Security Lights with new craft of LED chips can produce up to 3000LM brightness; Daylight Cold White 6000K; The super bright work light has 120° light speed angle without shadow, and wide beam distribution. And it save more than 85% of power, saving money on your electric bill.

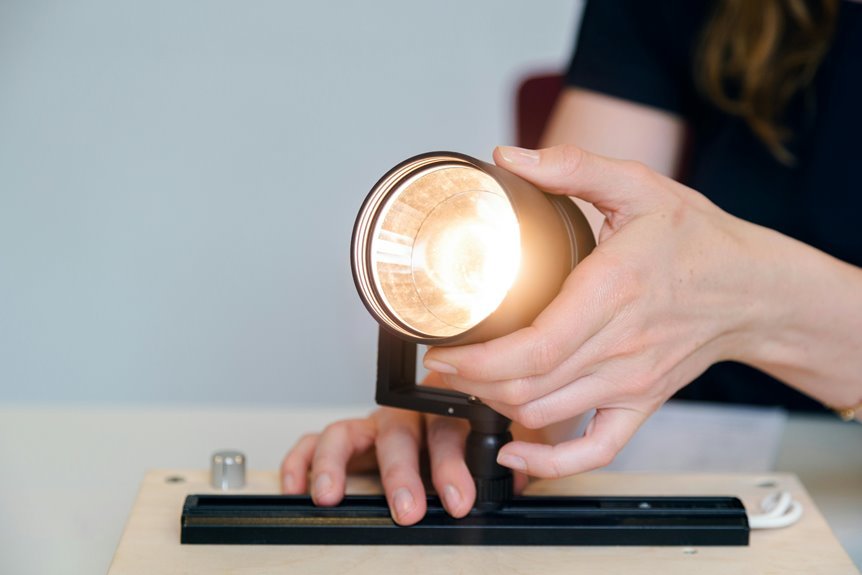
OUTDOOR LIGHTING: The OFTH Twin PAR Holder provides focused illumination for outside lights in residential and light commercial areas; These flood lights can be used as driveway lights, patio lights, and more
Zone 2: Pathways and Walkways-Lumen Balance for Safety and Mood

How do you light a pathway without turning it into an interrogation room? I’d aim for 100–200 lumens per fixture, which gives you solid safety illumination without creating those harsh, unwelcoming pools of light. Spacing multiple lower-output lights along your path works better than one bright spotlight. You’ll get even coverage that feels natural, letting folks walk comfortably while keeping that warm vibe. I focus on beam angles between 60–120° to maintain consistent ground illumination with no dark gaps or blinding spots. The key is balancing visibility with mood, so your guests feel safe and relaxed. Pathway lighting is about creating a welcoming route that says, “you belong here”—not about raw brightness.
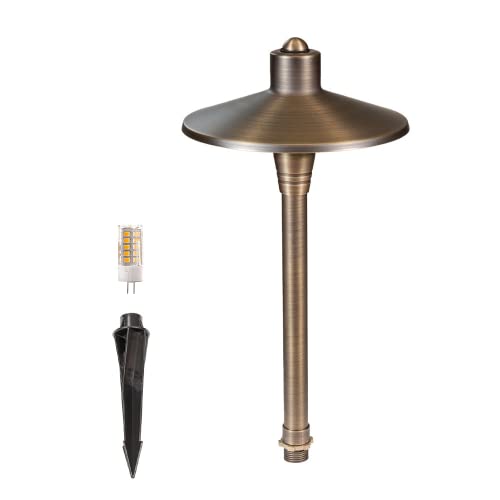
PROFESSIONAL GRADE - This solid brass miniature path light features a convex clear polycarbonate lens, 4-foot 18AWG SPT-1 lead wire and 9-inch PVC mounting stake. A rubber plug protects the wire entry point from moisture.

ENERGY-EFFICIENT & BRIGHT LED LIGHTING. This 1.1W low-voltage landscape light delivers 32 lumens of warm, 2900K soft white illumination. Perfect for creating a cozy, inviting atmosphere in your courtyard, garden, or pathway while consuming minimal energy

1PK Landscape Path Light: This low voltage pathway light is designed to provide a warm and inviting ambiance to your outdoor spaces. With 1 light unit in each package, it is perfect for illuminating small areas or accenting specific features in your garden or patio. The 1.5W LED chips will produce 100 lumens of bright, warm white light with a color temperature of 3000K
Zone 3: Trees and Uplighting-Lumen Guidelines for Focal Drama

When you’re ready to make a tree the star of your outdoor space, uplighting—shining lights upward from the ground—creates that dimensional, dramatic effect you’re after, and it all comes down to choosing the right technique, understanding how dense your tree’s canopy is, and picking fixtures that’ll actually do the job without creating weird bright spots or shadows. You’ll want to consider things like whether you’re lighting a small, delicate tree (which might need just 120–180 lumens per light) or a massive oak with a thick canopy (which could need 250–300 lumens), and spreading multiple smaller lights around the base usually looks way better than cramming one super-bright fixture underneath. The trick is matching your fixture placement and brightness to your specific tree’s size and leaf density, so the whole canopy glows evenly instead of looking like a spotlight show gone wrong.

SOLID BRASS MATERIAL: Fixture housing made of die-cast brass, thickened tube walls make it stronger, unique finish pickling process to maximize the life of the fixture, stable quality of CNC production process, corrosion and moisture resistant, prime choice for coastal or rainforest

[3 Color Temperatures & Stepless Dimming] This wireless indoor spotlight features three color temperatures—warm (3000K), natural (4500K), and cool white (6500K). Long press for stepless brightness adjustment from 10% to 100%, perfect for use as a wireless plant spotlight, picture light, or accent lighting.

UPDATED TRANSFORMER: DC24 100W transformer included in the set, no need to purchase a driver separately.
Uplighting Techniques For Trees
Trees deserve the spotlight—literally—and I’ve found that positioning multiple smaller fixtures around the tree works better than relying on one powerful light from below. Instead of cramping all your lumens into a single fixture, space several lower-output lights around the tree’s circumference. By positioning fixtures at different heights and angles, you’ll eliminate those awkward shadows and hot spots that make trees look flat or washed out. This technique creates depth and texture across your canopy while maintaining consistent light across every branch and trunk.
Canopy Density And Fixture Selection
So what’s the real difference between lighting a skinny ornamental tree and a massive oak with branches thicker than your arm? Canopy density changes everything about your uplighting strategy. Dense canopies need multiple fixtures working together—think two or more lights at around 120–210 lumens each—rather than one powerful fixture trying to do it all. This distributed approach gives you even coverage without creating harsh shadows or glare. Your fixture selection matters too; narrower beam angles (15–30°) keep light focused where you want it, preventing wash into neighboring areas. By matching your lumen range and beam angle to your tree’s actual thickness, you’ll create that dramatic glow everyone admires while keeping things balanced and beautiful.
Zone 4: Accent Features-Garden Lighting Lumens for Subtle Highlights

Now that you’ve got your trees looking dramatic with uplighting, let’s talk about those smaller garden stars—the accent features that deserve their own spotlight without stealing the show. I’ll walk you through picking the right lumen range and beam angles so your sculptures, shrubs, and special plantings glow appropriately, and then show you how to space multiple fixtures together for a balanced, natural-looking highlight. No more guessing whether you need one bright light or several softer ones; we’re going to make this straightforward.

Please visit our Amazon store (link above) to see all of our available models.
Please visit our Amazon store (link above) to see all of our available models.
Feature Highlighting Techniques
Want to make your garden’s best features shine without turning your backyard into a stage show? I’ve found that balancing your accent lighting with the right lumen ranges and beam angle choices works well. You’ll want fixtures between 100–120 lumens for those subtle highlights that grab attention without overwhelming your space. I prefer using a narrow to mid beam angle—roughly 15–60 degrees—to focus light exactly where it matters. Pairing your feature highlighting with ambient lighting creates depth, making those garden elements stand out naturally. By layering these outdoor lighting zones strategically, you’re not just illuminating features; you’re creating an inviting atmosphere where everyone wants to gather.
Lumen Range Selection Guide
How do you light up your favorite garden spot without making it look like a baseball field? I’ve found that accent lighting works best when you aim for 50–185 lumens per fixture, targeting around 117.5 lumens as your sweet spot. The key point—instead of one bright light creating harsh glare, I use multiple lower-output LED fixtures, like two 60–90 lumen lights, for even, glare-free lighting that feels natural. The lumen range you choose really matters. These LED fixtures balance energy efficiency with that subtle glow gardens deserve. I’ve learned that narrow beam angles and careful placement prevent hotspots, so your outdoor lighting highlights features beautifully without overwhelming the scene. It’s how accent lighting should feel—just right.
Zone 5: Patios and Decks-Lumen Ranges for Entertainment

Three things make a patio work well for evening gatherings: the right amount of light, the right *kind* of light, and the ability to change it up as the night goes on. I’m talking about hitting that sweet spot of 100–200 lumens per square foot for your main patio lighting, which creates a welcoming environment without feeling like a stadium. Soft, warm white dimmable LED fixtures are your best choice here—they’ll adjust the mood as everyone settles in. Layer your entertainment lighting by combining ambient fixtures around 150 lumens with task lighting near seating areas and fire pits, using spotlights at 12–100 lumens for emphasis. Include a dimmer, use multiple fixtures to prevent glare, and your outdoor space becomes a place where people actually want to spend time.

Energy-Saving 4.3W LED Performance Each compact step light provides 48 lumens of warm 3000K illumination, offering optimal visibility for outdoor stairs while maintaining low energy consumption with integrated LED technology

Ultra-Efficient 1.2W LED Performance: Each slim step light delivers 33 lumens of warm 3000K illumination, providing safe guidance on stairs and pathways while consuming minimal energy with maintenance-free integrated LED technology

Ultra-Efficient 1.2W LED Performance: Each slim step light delivers 33 lumens of warm 3000K illumination, providing safe guidance on stairs and pathways while consuming minimal energy with maintenance-free integrated LED technology
Zone 6: Steps and Edges-Low Lumen Safety Lighting

While your patio’s ambient glow sets the mood for the evening ahead, there’s another layer of lighting that quietly does the demanding work—the kind that keeps your guests from taking a tumble down the stairs or stumbling over a deck edge in the dark. Zone 6 safety lighting focuses on practical, low-lumen solutions that guide foot placement without creating glare.
What works best for steps and edges:
- Use 12–100 lumens per fixture for subtle edge lighting along paths
- Install about 125 lumens per fixture on stairs for even nosing illumination
- Choose narrow to medium beam angles (15–60 degrees) to focus light downward
- Select warm LEDs with high CRI (90+) and 2700–3000K color temperature
This approach keeps everyone safe while maintaining your outdoor space’s welcoming ambiance.

Ultra-Bright 8500LM Illumination: Equipped with 84 high-efficiency LED beads, this 85W security light delivers 8500 lumens of 6500K daylight, making it perfect for large outdoor areas like backyards and commercial spaces where maximum visibility is required. Moreover, it enables significant electricity savings of up to 88% on your bill compared to traditional halogen lights.

3 LIGHTING MODES: Choose motion-activated operation, dusk-to-dawn, or both—so your light stays on through the night and brightens when it senses movement. Available in 1, 2, and 3-head styles with black or white finish

Solar Powered, Energy Saving: The solar light outdoor powered by solar energy, no need for electricity bills. The solar panel is monocrystalline silicon, it still can obtain low current charging in the cloudy, rainy days or in areas where sunlight is insufficient
Zone 7: Zone Integration-Balancing Total Lumens Without Overwashing

Now that you’ve planned each zone individually, the integration process begins—because brilliant accent lighting next to an over-lit pathway can actually make both look worse, not better. That’s where zone integration comes in. You’ll want to aim for a coordinated total lumen target by layering ambient lighting, accent fixtures, and task lights strategically. Think of it like seasoning—each fixture contributes its own output without overwhelming the others. Your pathway might use 100–200 lumens, while uplights stay around 120–300 lumens. The key? Verify your fixture output respects transformer capacity, leaving room for future upgrades. Field testing afterward helps you adjust everything to create a balanced, cohesive glow.

✅ Premium Bronze Finish, Timeless Pathway Design: Elegant bronze-tone finish and classic pathway shape add a refined architectural look to walkways, driveways, and garden paths — enhancing curb appeal without overpowering your landscape.

Elegant & Stylish Design: The sleek and modern design of these low voltage pathway lights add a touch of elegance to any outdoor setting. You love the way these 12V AC path lights look and the ambiance they create. Our 12V AC landscape lights, are a reliable and efficient addition to your landscape lighting system. With its 0.6W LED and 22 lumen brightness, this light emits a warm and inviting glow that enhances the beauty of your outdoor space

Bright Lights & Wider Coverage: These low voltage pathway lights feature 5W LED chips that output 500 lumens of 3000K soft white light. The advanced optical design ensures a broad illumination range, effectively lighting up your path, yard, or garden with clear and even brightness


