

Divide your room’s square footage by 25—that’s your baseline number. A 250-square-foot kitchen? You’re looking at about 10 recessed lights. But here’s the thing: ceiling height matters too. Eight-foot ceilings need lights roughly 4 feet apart, while 12-foot ceilings can stretch to 6 feet. Kitchens might need extras near islands and sinks, bathrooms around mirrors. Don’t line them up along walls, though—that just creates dark spots in the middle. Start with that baseline, then adjust based on what you actually do in each space.
Recessed Lighting Basics: The 25-Square-Feet Rule

How do you figure out where to start when you’re planning recessed lights for a room? I’d recommend using the 25-square-feet rule—a simple baseline that helps with space planning before you get too deep into the details. Here’s how it works: divide your ceiling’s square footage by 25, and that gives you your starting fixture count. So a 250-square-foot room needs roughly ten recessed lights to begin with.
This approach matters because it prevents you from guessing blindly. You’re not just throwing fixtures everywhere; you’re working from a logical foundation. Before adjusting for lumens, task areas, or room function, this rule gets you oriented. Think of it as your lighting roadmap—practical, straightforward, and helpful for avoiding those awkward dark corners we’ve all experienced.

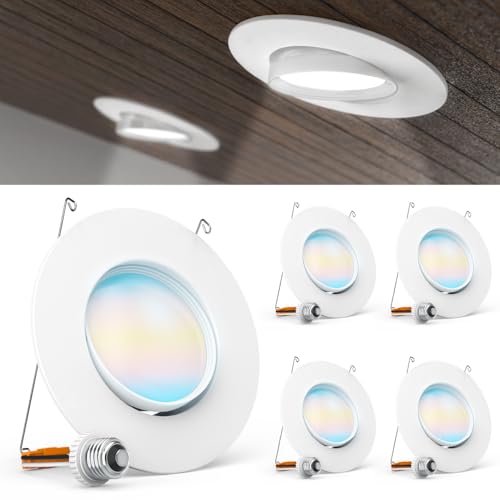
High Quality White Plastic Trim Ring for Down Lights

Customizable Ambiance for Every Space: Achieve the perfect lighting atmosphere for your living room, kitchen, bathroom, bedroom, garage, or warehouse. Our 8" canless LED recessed lights offer 5 adjustable color temperatures (2700K-5000K) controlled via a junction box switch. Select warm tones for relaxation or cool daylight for task-oriented areas—all with one versatile fixture.

Matte White finish. Covers unsightly, torn drywall caused by the removal of existing trim
How Ceiling Height Affects Recessed Light Spacing

Your ceiling height is the primary factor controlling your spacing layout, and adjusting for it matters more than most people realize. If you have standard 8-foot ceilings, the half-height rule (roughly 4 feet apart) works well, but at 10 or 12 feet, you’ll need to space fixtures further apart while potentially increasing wattage to maintain even illumination and avoid dark zones between light pools. Greater height requires careful attention to overlap and beam angles, because what performs effectively in rooms with lower ceilings may leave inadequate lighting in taller areas.

INSTALLATION: Easy retrofit led recessed lighting design fits most existing 6 inch recessed lights housings. matches HALO's most popular canless fixtures, making it perfect for remodel projects or new construction without requiring additional housing modifications for seamless integration.

⭐ 6 Inch Ceiling Can Baffle Trim with Detachable Ring

Spacing Guidelines By Height
Ever wonder why some rooms feel perfectly lit while others have those awkward dark spots right against the walls? Recessed lighting spacing really depends on your ceiling height—it’s actually straightforward once you know the formula.
Here’s what works: use about half your ceiling height for fixture spacing. So an 8-foot ceiling means roughly 4 feet between lights, while 9-foot ceilings work better with 4.5-foot spacing, and 10-foot ceilings need about 5 feet apart. Going higher? A 12-foot ceiling calls for up to 6 feet between fixtures.
The key detail—place your first row 2 to 3 feet from walls. This wall wash avoidance keeps edges bright and creates balanced general illumination throughout your space.
Adjusting For Tall Ceilings
Those spacing rules I mentioned work great for standard 8 to 10-foot ceilings, but what happens when you’re dealing with soaring 16-foot vaulted spaces or cathedral ceilings that seem to go on forever?
Taller ceilings change how you approach lighting. Your beam spread actually works for you now, letting fixtures spread light across wider areas. You can push your fixture spacing farther apart—think 6, 7, or even 8 feet—because the light travels down and out more effectively. The first row distance from walls can stretch too, maybe 3 to 4 feet instead of the usual 2 to 3.
I’d recommend narrow-beam LED fixtures for these tall spaces. They keep light concentrated downward, preventing those awkward dark zones between cans that plague high ceilings. The right ceiling height and fixture combination are important for proper coverage.
Light Counts for Kitchens, Bathrooms, Living Rooms, and Bedrooms

Different rooms have completely different lighting jobs, so I’ll walk you through what each space actually needs—kitchens demand the most fixtures because you’re chopping, cooking, and reading recipes, while bathrooms need bright, moisture-resistant lights around mirrors for grooming tasks, and bedrooms benefit from fewer, dimmable options so you’re not blinded at night. Living rooms work well with a balanced mix that avoids that harsh, single-light-source look, and the numbers vary depending on whether you’re working with a cozy 12×12 space or an open-concept area that stretches far. I’ll break down the specific counts for each room type, so you can figure out exactly what’ll work for your home without overloading your ceiling or leaving dark corners.

【Product Dimensions】Each lamp: 6.69"Dia. x 4.47"H (17x12cm) shade, adjustable 59"(150cm) chain. Polished brass finish resists rust. Includes 2 x G45 6W LED bulbs (2700k warm glow). Hardwired with rotary switches. UL certified for safety assurance.

Three-Layer Lighting: This kitchen pendant light innovatively positions three-layer light strips on its sides, bottom, and curves for 360° surround lighting. It offers vibrant colors for visual expression, becoming a focal point in your space.

【E26 Socket Adapter】 Compatible with E26/E27 Base ONLY,confirm you have a medium-based E26/E27 bulb inside your recessed can housing before ordering.
Kitchen Lighting Requirements
Why do kitchens need so many recessed lights compared to other rooms? Well, you’re prepping food, reading recipes, and spotting spills—tasks that demand serious visibility. I’d start with about one light per 25 square feet, then add more for islands and countertops where shadows love to hide. Your ceiling height matters too, no, really.
| Ceiling Height | Spacing Between Lights | Estimated Fixture Count |
|---|---|---|
| 8 feet | 4 feet apart | 1 per 25 sq ft |
| 10 feet | 5 feet apart | Increase by 20% |
| 12 feet | 6 feet apart | Increase by 30% |
I’d add extra fixtures near sinks and islands, then mix dimmable LEDs with adjustable task lights. That way, you’ve got bright work lighting when you need it, plus softer ambiance for when you’re done cooking.
Bathroom and Bedroom Counts
Once you’ve got your kitchen dialed in, bathrooms demand a completely different lighting strategy—they’re all about task work right in front of the mirror, where shadows on your face are basically your enemy. I’d recommend multiple recessed lights paired with vanity fixtures to nail even illumination. For bedrooms, you’ve got more breathing room. Here’s what works:
- Bathrooms need 1 light per 25 square feet, bumped up for mirror zones
- Dimmable cans let you adjust bedroom ambiance from bright to cozy
- A standard 10×12 bedroom typically needs 4–6 recessed lights total
- Bedside lamps complement overhead fixtures well
The square footage rule guides your planning, but bathrooms and bedrooms play by slightly different rules. Bathrooms prioritize clarity; bedrooms prioritize flexibility. That’s where function meets comfort.
Living Room Distribution Strategies
Living rooms are where your lighting really gets to show off—they’re the hardest-working spaces in your home, shifting from bright and energetic when you’re entertaining to soft and relaxing when you’re settling in for the evening. I’d aim for one recessed light per 4 to 6 square feet, spacing them roughly 4 feet apart with 2-3 feet from walls to avoid dark corners. Here’s what works:
| Room Size | Recessed Lights | Color Temp | Dimmable? |
|---|---|---|---|
| 200 sq ft | 35–50 | 2700K | Yes |
| 300 sq ft | 50–75 | 3000K | Yes |
| 400+ sq ft | 75+ | 2700K–3000K | Yes |
Layer your ambient lighting with wall sconces or soffit lights to highlight key areas like fireplaces. This distribution strategy prevents that flat, one-note feeling, letting you create the mood you want based on the time of day and activity.
The 4-Foot Spacing Guide for Even Light Distribution

How’d you like a simple formula that actually works? I’ve got one for you. Take your ceiling height, divide it by two, and boom—that’s your spacing guide for recessed lights. Here’s what I mean:
Take your ceiling height, divide it by two, and boom—that’s your spacing guide for recessed lights.
- An 8-foot ceiling means roughly 4 feet between fixtures
- A 10–12 foot ceiling works better with 5–6 foot spacing
- Place the first row 2–3 feet from walls to avoid dark corners
- Wider spacing prevents over-filling your ceiling while maintaining even light distribution
This straightforward approach creates balanced illumination across your room without leaving shadowy gaps. You’ll want to adjust things based on your room’s purpose, brightness needs, and natural light coming in—those factors matter—but this spacing principle gives you a solid starting point. Plenty of homeowners have used this method to get their room lighting right.

🔩 Upgraded Stable & Removable Shelves: Say goodbye to sliding or falling glass shelves. Our secure clip-on design keeps the metal shelves firmly in place, offering reliable storage that you can count on. Plus, the shelves are removable, letting you customize the space to fit your needs perfectly (𝗦𝗵𝗲𝗹𝘃𝗲𝘀 𝗮𝗿𝗲 𝗽𝗹𝗮𝗰𝗲𝗱 𝗶𝗻𝘀𝗶𝗱𝗲 𝘁𝗵𝗲 𝗳𝗼𝗮𝗺 𝗰𝘂𝘀𝗵𝗶𝗼𝗻𝘀, 𝗮𝗻𝗱 𝗰𝗼𝘃𝗲𝗿𝗲𝗱 𝗯𝘆 𝗽𝗮𝗽𝗲𝗿𝗯𝗼𝗮𝗿𝗱)

Upgraded Lighted Medicine Cabinet with Interior Sensor Light - The lighting features ultra-bright, high-density LED strips (192pcs 13W beads per meter, CRI>90), casting a glow that eliminates shadows and dark spots for a flawless reflection. Flicker-free and evenly distributed, the light brings out the truest colors and details of your image. With a simple touch, personalize your lighting from a soft dim to full radiance & set the mood with 3 color temperatures (cool, natural & warm light)

【Custom Lighting & Anti-Fog for Convenience】This TETOTE black lighted medicine cabinet offers 3 adjustable color temperatures (Cool, Natural, Warm) and 10%-100% stepless dimming, allowing you to create the perfect lighting for any occasion. The fast & safe anti-fog function ensures a clear reflection even in steamy conditions, while the memory function remembers your preferred settings for a personalized, convenient experience every time.
Where to Position Recessed Lights for Even Coverage

Where you place each light matters just as much as how many you install—maybe even more, honestly. Centering recessed lights over counters or work zones, rather than lining them along walls, creates balanced illumination. Your room dimensions and ceiling height determine everything; they’re your blueprint. When spacing fixtures, think about overlapping those light pools to avoid dark spots. Keep fixtures 2–3 feet from walls, and remember, higher ceilings let you stretch that spacing to 5–6 feet apart. This prevents bunching in the middle, which happens more often than you’d think. Even coverage comes from strategic positioning that makes your space feel deliberate and welcoming.
5/6 Inch Gimbal LED Downlight Fits 5” or 6” Recessed Cans
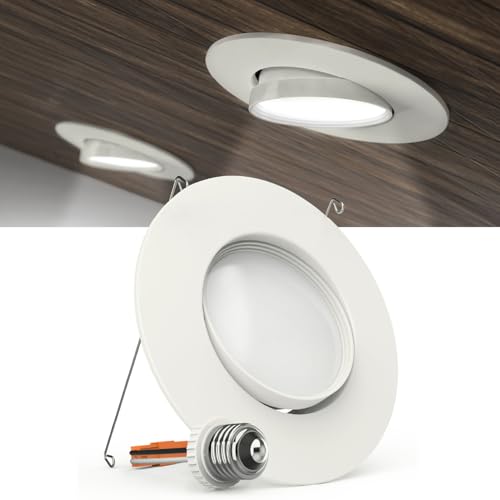
5/6 Inch Gimbal LED Downlight Fits 5” or 6” Recessed Cans

5/6 Inch Gimbal LED Downlight Fits 5” or 6” Recessed Cans
4-Inch vs. 6-Inch Can Lights: Cost, Style, and Performance

Once you’ve nailed down your spacing and positioning, you’ll face a choice that sneaks up on most people—should you go with 4-inch or 6-inch recessed cans?
Here’s what separates them:
4-inch and 6-inch recessed cans differ in brightness, installation depth, cost, and visual impact on your ceiling design.
- Lumen output & beam angle: 6-inch cans deliver brighter light and wider spreads, meaning you’ll need fewer fixtures overall
- Install depth: 6-inch models require deeper ceiling space, while 4-inch options fit snugly in tight spots
- Maintenance and cost: 4-inch cans with replaceable bulbs let you adjust color temperature later; 6-inch integrated LEDs cost more upfront but run efficiently
- Aesthetics: 4-inch blends invisibly into ceilings, while 6-inch creates a more noticeable pattern
For task-heavy kitchens, lean toward 6-inch. For smaller rooms or limited budgets, 4-inch keeps things simple and affordable. Your ceiling depth and room size ultimately decide it.

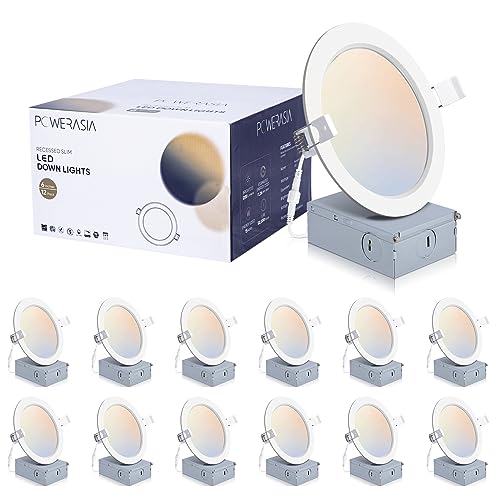
DESIGN: Canless recessed lighting design eliminates the need for housing or J-box, featuring easy spring clip installation that secures the 8 inch recessed led light firmly in drywall or suspended ceilings

8-ft. track section is constructed of rigid, extruded aluminum, offering durable, secure mounting for track fixtures; actual length is 91-7/8"

Night light Feature: 8 inch led recessed light in night light mode emits 2000K amber for very soft illumination and added ambiance. It also can provide no-glare lighting when you wake up at night which is very convenient.
Common Recessed Lighting Mistakes: Dark Spots and Over-Lighting

Even installed recessed lights only to end up with shadowy corners and flat, lifeless rooms? You’re not alone, and I’ve learned that spacing matters hugely. When you place recessed cans too far apart or too close to walls, you create dark spots right where you need light most. Here’s the thing: over-lighting with too many fixtures crammed into a small area wastes energy and creates annoying glare, while still leaving corners dim. I discovered that relying solely on recessed cans—especially in kitchens—leaves task areas like countertops completely neglected. The real solution? Layered lighting. Combine your dimmable recessed cans with pendants, sconces, or under-cabinet lights. This balanced approach prevents those frustrating dark spots and gives you control over your room’s mood.

Top Rated Retrofit LED Downlight with Baffle Trim

HIGH QUALITY: LED Disc ceiling light use 7.25inch Round Metal cover guarantees corrosion protection and rust prevention, More Bright, Saves Energy and NO Flickering. Only output at 16.5 watts provide well-balanced light, available 50,000H lifespan
💡【Five-temperature Dimmable】 The recessed lighting 6 inch fixtures is dimmable, 2700K(Soft White), 3000K(Warm White), 4000K(Neutral White), 5000K(Cool White), 6000K(Daylight). The temperature and color of the five gears can be adjusted. High CRI(90), intuitive display, different color temperature for option.
Why Recessed Lights Alone Aren’t Always Enough

So here’s what I learned after fixing those dark corners and glare problems: recessed cans, by themselves, just can’t do everything your room needs.
Think about it—those overhead lights alone create a flat, commercial vibe that doesn’t match a residential setting. You need layered lighting to actually make your space work:
Overhead lights alone create a flat, commercial vibe. Residential spaces need layered lighting to actually work.
- Ambient lighting from recessed fixtures forms your foundation, providing overall brightness
- Task lighting via under-cabinet strips or pendants lets you work comfortably in kitchens and home offices
- Accent lighting highlights architectural features and artwork with strategic placement
- Dimmer switches give you flexibility to shift from bright daytime settings to relaxed evening moods
When you combine recessed lights with sconces, pendants, and accent lighting, everything works together. Your room becomes more livable and personalized—not like a dentist’s office, no, really.

Effortless & Instant Installation: No Tools, Wiring, or Remodeling Needed! This recessed light converter kit installs in minutes with just your hands—no electrician required. The standard E26 socket fits most 5" & 6" recessed cans, delivering a flawless finish for instant pendant light conversion without extra work

【E26 Socket】 Compatible with E26/E27 socket ONLY,confirm you have a medium-based E26/E27 bulb inside your recessed can housing before ordering.

【Product Dimensions】Each lamp: 6.69"Dia. x 4.47"H (17x12cm) shade, adjustable 59"(150cm) chain. Polished brass finish resists rust. Includes 2 x G45 6W LED bulbs (2700k warm glow). Hardwired with rotary switches. UL certified for safety assurance.
Dimmers and Bulbs: Maximizing Control and Flexibility

Why settle for lights that only work one way? I’ve learned that dimmer compatibility matters when you’re building your lighting setup. When you choose dimmable cans with replaceable bulbs, you’re giving yourself options—and that’s valuable. See, integrated LED modules might seem convenient, but they lock you into one brightness level forever. Not ideal.
Here’s what I do: I pair my primary dimmable cans with a dimmer that actually works with them (triac, ELV, or 0-10V—check yours), then I layer in specialty fixtures only when I genuinely need them. This approach lets me create lighting layers that shift from cozy to focused without swapping anything out. You get ambient light when you want it, task lighting when you need it, all through one simple control. That’s real flexibility.

Brightness & 3 Color Temperatures: Our lighted bathroom mirror cabinet offers stepless dimming and 3 color temperatures, ideal for makeup or low-light use at night. It also remembers the last brightness setting automatically.

The frame of the cabinet is made of FSC-certified wood.

[2-in-1 Mirror & Jewelry Cabinet]: This wall mounted jewelry cabinet combines a full-length HD mirror with a spacious jewelry organizer. Use it as a dressing mirror to check your outfit from head to toe while keeping all your jewelry neatly stored in one place.


