
Yes, you can absolutely stick peel-and-stick tile over ceramic. The key is that your ceramic has to be smooth, clean, and completely dry. Deep grout lines are basically your enemy here; they create gaps that mess with adhesion. Glazed ceramic tile works great, but you’ll need to skip textured surfaces and moisture-prone bathrooms. Get that surface prepped properly, and you’ll have a solid installation—though there’s definitely a right way to do this.
Yes, You Can Install Peel-and-Stick Tile Over Ceramic: With the Right Prep

Yes, you can install peel-and-stick tiles over ceramic tile, and it’s an effective solution for anyone wanting a quick refresh without major renovation stress. The key? Preparation is everything. Your existing ceramic tile needs to be flat, clean, and dry—no shortcuts here. I’m talking about thoroughly cleaning and degreasing that surface so your new peel-and-stick tiles actually stick around for the long haul. Remove any damaged or cracked tiles first, since loose spots will sabotage your whole project. If you’ve got deep grout lines, consider a light skim coat to smooth things out. Do this right, and you’ll get the results you’re after.
PROVEN - MILLIONS OF SQ FT INSTALLED OVER 15 YEARS !!!
1.4 Times Coverage Area - Come in a pack of 10 sheets of self-adhesive tiles, 12" X 12" each, which can cover 40% more area than 10"x10" tile does.
Which Existing Tile Types Accept Peel-and-Stick Best?

Not all existing tiles work equally well with peel-and-stick applications, and this distinction matters significantly. Ceramic tile is your best option—smooth, clean, and flat ceramic surfaces adhere to peel-and-stick materials effectively. Porcelain tile also performs well, providing strong adhesive grip once dry. Glass tile can work with proper preparation, though deep grout lines may require leveling first. Marble presents challenges; if it’s unsealed or damaged, adhesion problems will occur, so seal it completely before application. Mosaic tiles with chunky grout lines also need attention—skim coating prevents telegraphing effects. The bottom line: smooth, solid surfaces work best with peel-and-stick applications.

✔【PREMIUM QUALITY】Our Peel and Stick Floor Tiles are crafted with high-quality vinyl, ensuring durability and longevity. Each pack contains 40 tiles, each measuring 7.87 x 7.87 inches and providing a coverage of 17.2 sq.ft - The ideal choice for revitalizing your space.
Warm tips: you can apply small pieces of tape, stick to the back to assist in tearing the paper on the backing. Elegant Marble Appearance: These backsplash tile decals measure 11.8" x 11.8" (30 cm x 30 cm), and 20 pieces will about cover an area of 19.2 square feet. They mimic the sophisticated look of marble and add a touch of luxury to any space, making them perfect for enhancing the aesthetics of your kitchen, bathroom, or laundry room. They offer a stylish upgrade without the high cost of traditional tiles
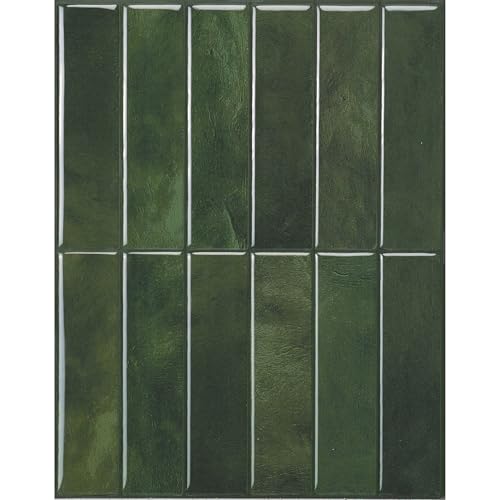
Ideal size with 30 sheets of peel and stick rectangle tiles. Each piece measures 3"x 9"x 0.16". Covers approximately 5.6 square feet in total. Remember to calculate 3-5% overage for your DIY project.
Will Your Grout Lines Support Peel-and-Stick Installation?

Why do grout lines matter so much when you’re sticking new tile over old? Well, here’s the thing—your grout lines are basically the foundation of your whole project, and they can make or break your success.
Deep or wide grout lines create gaps that prevent your peel-and-stick tiles from making full contact with the surface below, which means your new tile might lift or develop hollow spots (no, really). Here’s what you need to know:
- Uneven grout lines require skim coating to create a flush surface
- Porous grout absorbs adhesive, weakening your bond
- Mosaic patterns show through as visible impressions
- Large-format tiles perform better over existing grout
- Sealing textured grout improves adhesion significantly
Large-format tiles, honestly, give you your best shot at stable adhesion. Think strategically about your grout before you peel and stick.

【Set of basic tools】: Package includes craft art knife with 5 replaceable blades, red smoother, blue smoother with soft felt, measuring tape
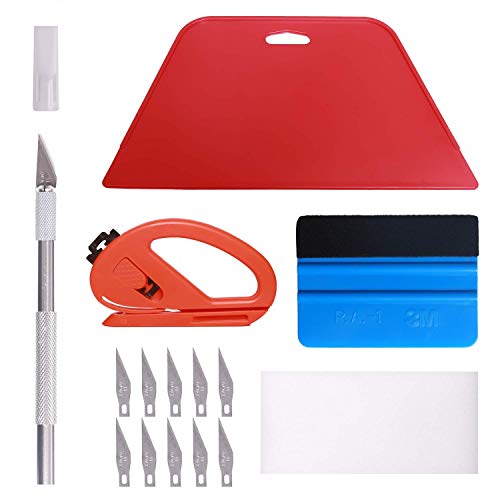
【Versatile Wallpaper Smoothing Tool Kit】This multi-function tool kit is including craft art knife with 10 replaceable blades, red and blue squeegee, vinyl cutter and sponge, which is perfect for wallpaper application, wallpaper trimming ceiling, self adhesive wallpaper, contact paper, countertop paint, ship-lap wallpaper, etc.

Carefully Curated wall paper kit :this wallpaper tools comprises all the necessary professional tools for wallpaper peel and stick installation.each tool is crucial for expert installation. This wallpaper tool kit can meet your various needs for cutting,smoothing,cleaning,applying.
Is Your Ceramic Tile Suitable for This Project?

Before you start applying peel-and-stick tile, you need to confirm your existing ceramic tile is ready for this application—and that means more than a quick cleaning. Your ceramic tile needs to be in good condition: no cracks, chips, moisture damage, or hollow spots underneath. If your tiles show any damage or instability, replace them rather than applying peel-and-stick over problem areas. The adhesive backing works best on smooth, clean, dry surfaces, so inspect thoroughly. Glazed ceramic tile typically accepts adhesive well, providing a solid foundation. Just make sure the surface is grease-free and stable. When your ceramic tile meets all these requirements, you can proceed with confidence.
EXCELLENT ADHESION: Adheres to all types of ceramic & mosaic tile
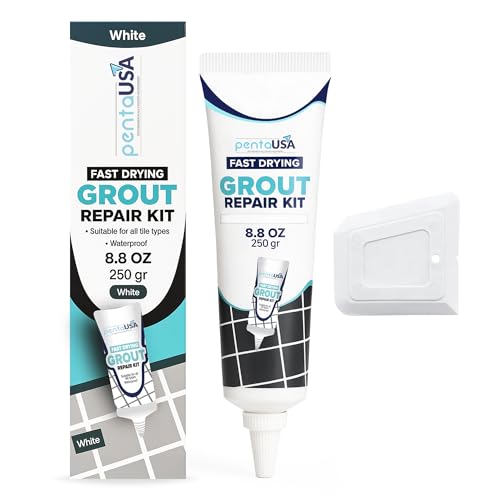
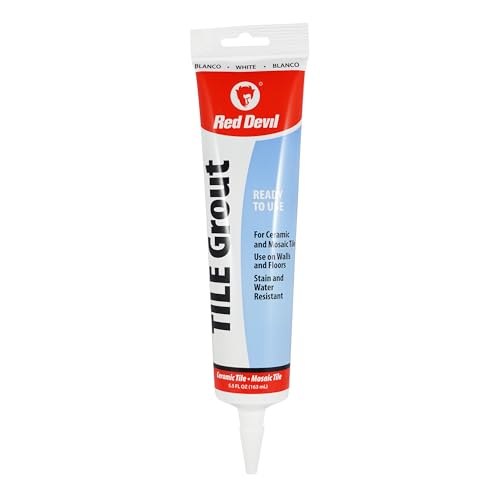
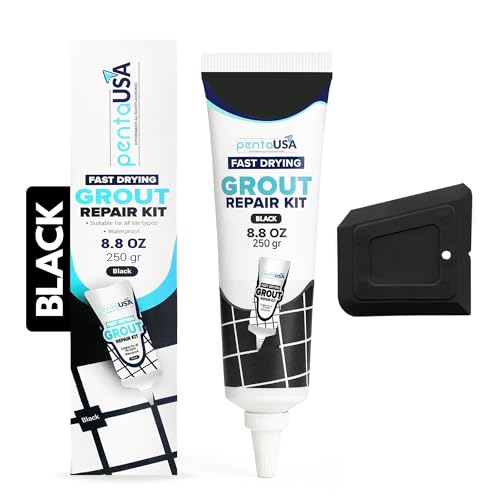
Acrylic Sanded Grout Filler That Cures Into Solid Grout - This premixed tile grout repair contains acrylic sanded grout material in a clean white tone that fills cracks, missing sections, and damaged joints, curing into solid grout-like material that bonds to existing grout and tile for durable structural repair on floors, walls, and countertops. Designed for DIY tile grout repair, suitable for first-time users, homeowners, and handyperson-level work.

Keep a clean, NATURAL APPEARANCE and improve the DURABILITY of your grout in your shower, kitchen, bathroom, and tile flooring
How to Prepare Ceramic Tile in 5 Steps

Before you stick down those new tiles, you need to get your ceramic surface ready. Skipping this step will likely result in peeling tiles within a few months. First, clean everything thoroughly with warm soapy water to cut through dirt and grease, then let it dry completely. Next, check for any cracks, chips, or loose tiles that could interfere with your project. If you find deep or uneven grout lines, fill them in so you have a smooth, even base for the adhesive to adhere to properly.

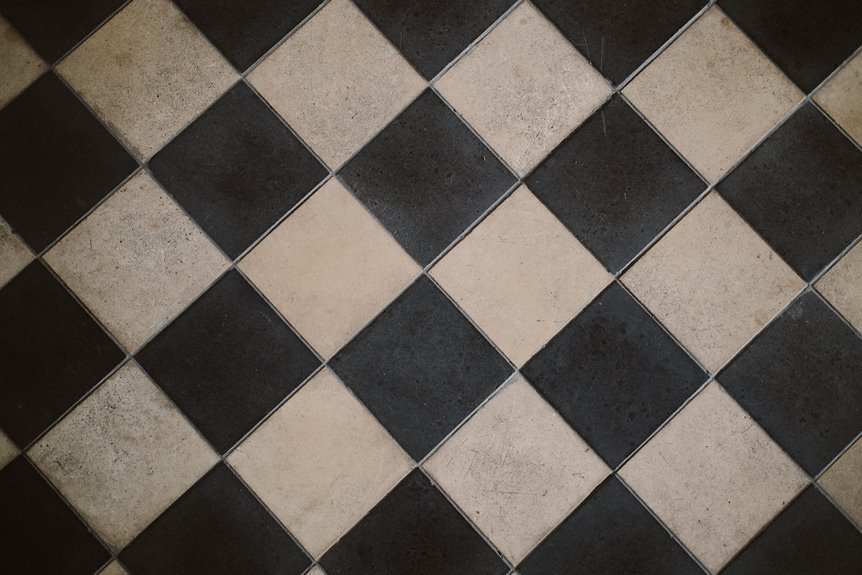
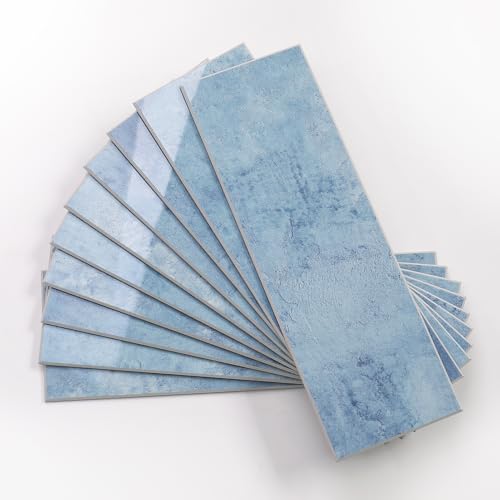
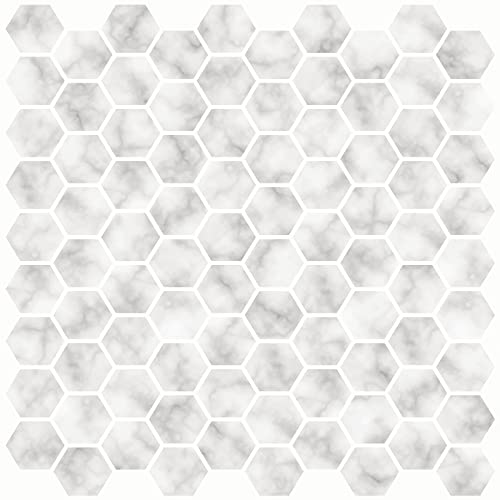
Marble inspired peel and stick floor tiles with a checkerboard styling
4 Tile Sheets Per Pack

Premium Materials:Made of PVC composite laminate, anti-scratch, high impact, color fadeless, more durable and stronger than other plastic self-adhesive tiles. Realistic marble texture and Long Oval Geometric design, which can be installed in Vertical or Horizontal styles, and match with most of the countertop.
Clean the Ceramic Surface
How clean does your ceramic tile really need to be? It’s the difference between peel-and-stick tiles that stick around and ones that peel away in weeks. You need spotless surfaces.
Start by scrubbing your ceramic tile with warm water and mild soap, getting into every corner. Here’s your cleaning plan:
- Scrub with warm, soapy water thoroughly
- Rinse completely and let it dry fully
- Use a degreaser for stubborn, greasy spots
- Optional light sanding creates better grip
- Wipe with a dry cloth before sticking tiles down
For tough residues, grab a specialized tile cleaner—it’s worth the investment. Once everything’s dry and dust-free, perform a quick tack test by touching the surface. You’ll know you’re ready when your peel-and-stick tiles have the proper foundation to bond correctly.
Repair Damage and Gaps
Now that your ceramic tile is spotless and ready to go, I’ve got to be honest with you—you can’t just slap peel-and-stick tiles over a damaged surface and hope for the best. Before you move forward, inspect your ceramic tile carefully for any cracks, chips, or moisture damage that’ll sabotage your project. If you find damage, fill those cracks and chips with appropriate filler right away—it matters. Deep or uneven grout lines? You’ll want to skim-coat the surface to create that smooth, flat substrate your peel-and-stick tiles need for good adhesion. Think of this step as building a solid foundation; you’re setting yourself up for success, not disappointment.
Ensure Complete Dryness
Once you’ve patched those cracks and smoothed out your surface, there’s one more thing standing between you and peel-and-stick success: moisture.
Water is the enemy of adhesive. Here’s why you’ll want to give your tiles serious drying time:
- Moisture causes adhesive failure and peeling
- Wet surfaces prevent proper peel-and-stick contact
- Trapped humidity compromises long-term durability
- Damp grout lines telegraph through new tiles
- Incomplete dryness leads to frustrating bubbles
Wait at least 24 hours after cleaning and patching before applying anything. I know it’s tempting to rush, but this patience pays off. You’re building something that’ll actually stick around, and that’s worth the wait.
Installing Peel-and-Stick Tile: Layout, Placement, and Pressing

Now that your ceramic tile’s prepped and ready, I’m going to walk you through the actual installation—and honestly, this is where things get fun because you’ll start seeing your new look come together. Before you peel off a single backing, I want you to dry-lay your tiles (just set them on the wall without sticking them), mark some guidelines so you’ll stay straight, and maybe start from the center or a clean edge so everything lines up perfectly. Once you’re happy with how it looks, you’ll press each tile down firmly with steady pressure, peel as you go, and trim any edges with a utility knife—and just like that, your space has a new appearance.

Material:Made of PVC composite laminate, anti-scratch, high impact, color fadeless, more durable and stronger than other plastic self-adhesive tiles. Glossy/Poished surface finishing with realistic ceramic look, high waterproof and stain-resistant performance, protect the walls from splash and oil.
Effortless installation, premium design – a smarter way to renovate. Smart Tiles are pioneers in self adhesive wall tiles, proudly made in Canada. Thanks to our patented adhesive, installation is fast and clean—no tools, glue or mess. Just peel and stick. Unlike low-grade sticky tiles or self adhesive vinyl, our high-quality stick on tiles won’t yellow, peel or crack over time. Perfect for upgrading your kitchen splashback, refreshing a bathroom, or creating modern wall panels —even in moisture-prone areas (not for direct water contact).

√Size of Tile - The size of each tile is 11.34" X 11.57"x0.16" thick (actual covering area), 1 sheet a package, about 1 square feet covering.
Measuring and Marking Guidelines
How’s your prep work coming along? Before you start placing those peel-and-stick tiles, I’m going to walk you through measurement and marking, because this step really helps set you up for success.
Here’s what I do to keep things straight:
- Clean your ceramic tile thoroughly with a damp cloth, then dry it completely
- Measure from your room’s center or a straight edge as your starting point
- Snap a chalk guideline to keep tiles aligned during placement
- Dry-lay a full row without backing to check your layout
- Mark any obstacle areas using a paper template for precise cuts
Taking time here prevents frustration later. You’ll appreciate having those guidelines when you’re placing each tile with firm, even pressure. We’ve all been there—a little planning saves headaches.
Dry-Laying Tile Placement
Before you peel away that backing and commit to the adhesive, here’s where dry-laying becomes your best friend—it’s like a dress rehearsal for your tile project. I start from the center or a straight edge, working outward to catch any wonky spacing before it’s permanent. You’ll stick those peel-and-stick tiles directly on your ceramic tile surface without removing the backing, testing the whole look first. I measure and mark guidelines to keep everything aligned, maintaining even margins around all edges. If you’re dealing with obstacles, I create a paper template, transferring that layout directly onto tiles I need to cut. This zero-pressure practice run lets you spot problems early. Once everything looks right, you’re confident peeling away that backing and actually adhering everything down.
Pressing and Securing Tiles
Once your dry layout looks perfect and you’ve checked everything twice, it’s time to actually stick those tiles down.
Here’s what you need to do:
- Remove the backing carefully and position each peel-and-stick tile
- Press firmly with even pressure across the entire tile surface
- Work methodically from your starting point outward
- Keep the surface clean and dry throughout installation
- Reseat any lifted edges immediately with adhesive
The key to strong adhesion is pressing each tile with deliberate, confident pressure that creates full contact with your ceramic base. If you notice edges lifting, apply a small amount of adhesive underneath and press again.
Why High-Moisture Areas Often Lead to Failure

If you’re thinking about applying peel-and-stick tiles over ceramic in your bathroom or kitchen, moisture is the problem that’ll get you every time. Here’s what happens: water sneaks into grout lines and under tile edges, creating hollow spots that weaken everything. Your adhesive bonds break down, tiles lift, and eventually delaminate completely.
| Problem | What Happens | Result |
|---|---|---|
| Humidity exposure | Weakens adhesive | Tiles peel up |
| Water seepage | Moisture beneath tiles | Hollow spots form |
| Direct spray | Warps underlying surface | Poor adhesion |
| Grout penetration | Seeps under edges | Tile instability |
| Unresolved moisture | Adhesive failure | Reduced tile life |
That’s why using moisture-rated peel-and-stick products with proper sealing matters in wet rooms. It’s a straightforward approach to preventing failure in high-moisture environments.

Coated with a clear epoxy layer for a glossy finish,Feels smooth and nice.

Tips: You can put small pieces of tape on the corners of the back to help tear off the paper on the back. Exquisite Marble Design: Elevate your space with these peel-and-stick wall tiles that boast an exquisite marble design. These tiles are perfect for decorating shower walls, kitchen backsplashes, or accent walls, providing a high-end look without the high cost.

【Color and Size Specifications】:1.5IN/38mm(Width), 10.5FT/3.2m(Length), 0.04IN/1mm(Thickness) Color: White caulk tape waterproof sealant caulk strip has a crease in the middle. CDFYREC caulking strip with crease design can be folded to 90 degrees for tightly sealing gaps between walls.
Common Installation Mistakes That Cause Peeling and Bubbling

Most peeling and bubbling problems don’t come from the tiles themselves—they come from what’s hiding underneath. I’ve learned that skipping prep work is the fastest way to watch your peel-and-stick process fail.
Here’s what I see go wrong most often:
- Skipping surface cleaning, leaving dust, grease, or moisture behind
- Rushing installation before the surface dries completely
- Ignoring uneven grout lines that create air pockets underneath
- Applying tiles over hollow spots or bumpy surfaces
- Using cheap adhesive that won’t hold up in wet areas
When you cut corners during preparation, those air pockets form almost immediately. The tiles start lifting at the edges within weeks. Taking time upfront to prep properly means your new tiles actually stay put—and that’s what we’re all after here.

A basic but versatile tool wallpaper peel and stick tool kit help you on wallpaper application,trimming ceiling,woodwork or baseboard projects,vinyl wrap,window tint or glass film
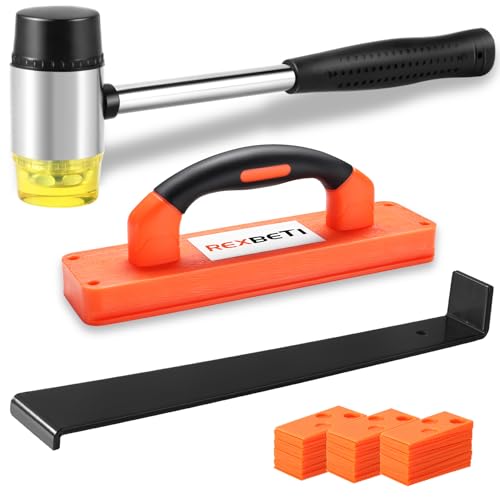
double-faced mallet with non-slip rubber grip help absorb vibration. Constructed of cast iron with bright chrome plating, the hammer is equipped with the hardness of 90±5 HAS. Double-faced solid rubber head delivers a softened, positive strike. The mallet head is 1-3/8 inch in diameter. The length of whole mallet is 10.3inch
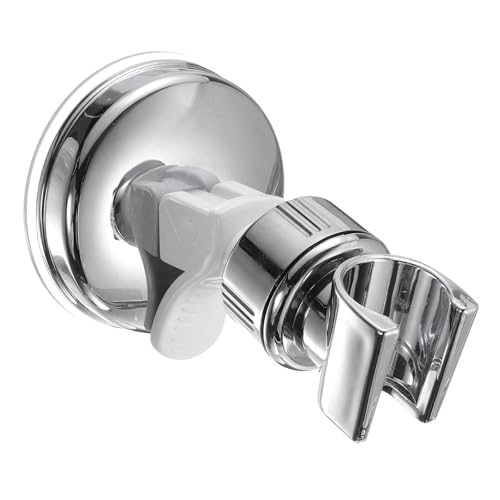
Rotating Suction Cup: The suction cup ensures the shower holder attaches to a smooth surface. The 360-degree rotating design can reposition the holder to meet your needs at various angles.
Best Applications for Peel-and-Stick Over Tile

Now that you’ve got your surface prepped and ready to go, let’s talk about where peel-and-stick tiles actually work—because honestly, they’re not the right choice for every spot in your home.
| Location | Works Great | Why |
|---|---|---|
| Backsplashes | Yes | Smooth, flat, stays dry |
| Kitchen walls | Yes | Easy to clean, minimal moisture |
| Bathroom floors | No | Too much water exposure |
| Shower areas | No | Constant moisture causes peeling |
| Accent walls | Yes | Adds visual interest |
| Textured surfaces | No | Poor adhesion, bubbling risk |
Peel-and-stick tiles perform well on smooth ceramic tile in interior spaces like backsplashes and accent walls where they won’t encounter heavy moisture or foot traffic. Skip floors entirely—your tiles will lift. Showers? Absolutely not. Stick with dry, protected areas, and your tiles will stay put for years.

Sanded Grout Filler That Cures Into Solid Grout - This premixed tile grout repair contains acrylic sanded grout material that fills cracks, missing sections, and damaged joints, curing into solid grout-like material that bonds to existing grout and tile for durable structural repair on floors, walls, and countertops. Designed for DIY tile grout repair, suitable for first-time users, homeowners, and handyperson-level work

400ml Epoxy Grout, Easy to apply, no hurry and no mess. Advanced dual tube design, No need for a mixer to premix, just need a dual-tubes epoxy gun to do the job. !!!NOTE: The dual-tubes caulking gun and tools are NOT included!!!
How to Remove Peel-and-Stick Tile Without Damage

The good news is that taking off peel-and-stick tiles doesn’t have to be a destructive, frustrating mess—you can actually remove them cleanly and keep your underlying ceramic tiles completely intact. Using heat to soften the adhesive works effectively, making the whole process simpler than expected.
Here’s your approach:
- Grab a heat gun and warm the seams gently
- Peel slowly and evenly, no rushing allowed
- Use a utility knife to lift stubborn edges
- Avoid excessive heat near adjacent surfaces
- Work methodically for a clean result
When you take your time and follow this approach, your ceramic surface will show little to no residue. The tiles come off cleanly with this method.

Red and white marble peel and stick floor tiles by Chris Loves Julia x FloorPops

Easy DIY, Just Peel & stick, cut with tin snip, utility knives or hand saws, saving large amount on labor

2-3 Times Thickness: Much thicker than ordinary peel & stick tile, 2mm-2.5mm each, durable and solid tile, unlike soft sticker tiles
Installation Temperature and Humidity for Peel-and-Stick Tile

Once you’ve got those old peel-and-stick tiles off and your ceramic surface is clean, you’ll want to set yourself up for success with your new installation—and here’s where the environment around you really matters. I’d keep that room between 65°F and 85°F, honestly, because the adhesive on your peel-and-stick tile needs warmth to bond properly. Watch your humidity too; too much moisture weakens everything. Before you start, let your space settle for at least 24 hours after cleaning—no, really, this matters. Avoid installing near heat sources or areas with temperature swings, which’ll cause your ceramic tile and new peel-and-stick layer to warp and lift at the edges. Handle moisture issues first if you’re working in a bathroom, or you’ll regret it later.
Durability Timeline for Peel-and-Stick Over Ceramic

If you’ve prepped your ceramic tile properly—and I mean really cleaned, dried, and checked for cracks or hollow spots—your peel-and-stick tiles can actually stick around for years without giving you grief. Here’s what shapes their durability timeline:
- Quality adhesive matters: Higher-quality products hold up longer on ceramic substrates
- Location affects longevity: High-moisture and heavy-traffic areas wear them faster
- Surface prep is important: Degreasing and smoothing grout lines dramatically improve adhesion
- Environmental conditions count: Temperature and humidity during installation set the tone
- Regular maintenance extends life: Keeping them clean prevents premature lifting
Most installations last 3–5 years easily when conditions are right, though some high-quality brands perform even longer. You’re not stuck forever either—heat-softening and careful peeling let you swap them out without damaging that ceramic base underneath.
Fixing Lifted Edges and Poor Adhesion

Why do peel-and-stick tiles decide to curl up at the edges like they’re offended by your floor? Honestly, it happens to the best of us. If your edges start lifting, grab a narrow applicator tip and work some manufacturer-recommended adhesive underneath—no, really, this stuff matters for protecting your surface long-term. Before you tackle the whole project, test adhesion on a small area first; catching problems early saves headaches later. Keep your room between 65°F and 85°F during installation because temperature swings sabotage adhesion faster than you’d think. For stubborn edges that keep lifting repeatedly, consider smoothing down those deep grout lines or rough texture spots. A flatter surface means less stress on your tiles’ edges, and everyone wins.


