
Gorilla Glue technically bonds ceramics, but—and this is the catch—it expands as it cures, which pushes your pieces apart and creates gaps you don’t want. You’ll get a strong final bond, sure, but the messy overflow and misalignment make it pretty frustrating for delicate repairs.
Gorilla Epoxy works better since it doesn’t expand, giving you that tight, precise fit instead.
For anything beyond shelf décor, you’ll want to know the specific tricks that actually work.
Does Gorilla Glue Actually Work on Ceramic?

While Gorilla Glue certainly can bond ceramics together—the company markets it specifically for that purpose—whether it’s your best choice is a different question entirely. Here’s the thing: it does create a strong bond once it’s fully cured, which is legitimately effective. But that expansion I mentioned? It’s real, and it matters on delicate ceramics. The glue expands as it cures, which can push your pieces out of alignment or squeeze out messy residue that’s tough to clean up. If you’re working with intricate shapes or tight-fitting joints, you’ll find yourself carefully clamping everything down and still worrying about the finish. I’d recommend testing on a spare piece first—it’s worth the peace of mind before tackling something you actually care about.

CERAMIC SAVIOR - Our newest ceramic glue is tailor-made for repairing cracked ceramic, porcelain, china and pottery. It delivers a flawless, incredibly strong, undetectable repair that promptly renews your cherished and fragile ceramic pieces to their former glory. With a food safe adhesive formula, broken mug and cutlery is no longer a concern.
Strong Adhesion: This porcelain repair kit is specially designed for fragile materials like ceramics and porcelain. It delivers strong bonding power to securely repair broken parts and ensures long-lasting hold without falling apart

Powerful Bonding Strength: Adhesive Guru Ceramic Glue creates strong, long-lasting bonds on ceramics, porcelain, pottery, figurines, vases, and more. Restore your cherished items with confidence knowing they’re securely fixed for years to come.
Why Gorilla Glue Expands (and Why It Ruins Ceramic Repairs)?

When the adhesive hits moisture—whether from the air, the ceramic itself, or the glue’s own chemistry—it triggers a chemical reaction that makes it expand like bread in the oven. That expanding force can push your ceramic pieces apart or create annoying gaps that wreck your repair. This expansion doesn’t just mess with the fit; it also squeezes out the sides of your joint, creating messy overflow that’s tough to clean and can stain or leave visible residue all over your repaired piece. So while Gorilla Glue bonds well to ceramic materials, that whole expanding thing makes it a risky choice for any repair where you need everything lined up perfectly and looking clean.

BONDS MOST ANYTHING: Weldbond is a versatile strong glue that bonds to a wide range of materials including wood, ceramic, glass, and tiles. Whether you’re working on DIY crafts or wood repair, this wood glue for crafts provides a secure and long-lasting hold. *Does not bond Metal with Ceramic
🏺Strong Bond for Ceramic & Porcelain: A versatile adhesive for restoring mugs, plates, porcelain figurines, vases, and pottery. It provides a permanent, heavy-duty hold on ceramic surfaces, ensuring your broken items are securely repaired.

[CAMALEAO CERAMIC SUPER GLUE]: More than just strong and fast— Medium adhesive has an impressive 2610 PSI strength and a rapid cure time of 30-60 seconds. This super glue is compatible with plastics, metal, leather, wood, ceramics, pottery and other materials to ensure reliable performance.
Chemical Reaction and Moisture
Why does Gorilla Glue seem to have a mind of its own when you’re trying to fix a cherished ceramic mug or vase? The answer’s actually pretty straightforward: moisture triggers a chemical reaction that causes expansion. When you apply Gorilla Glue to ceramic, it absorbs moisture from the air and starts foaming up, pushing your pieces out of alignment. This expansion behavior is unpredictable on tight joints—it can create gaps and distortion that damage your repair. You’re left cleaning up excess glue and dealing with a compromised fit. Here’s the thing: epoxy adhesives don’t expand this way, making them better for ceramic work. If you want precise, flat surfaces without surprise swelling, epoxy is the better choice.
Expansion Forces on Ceramics
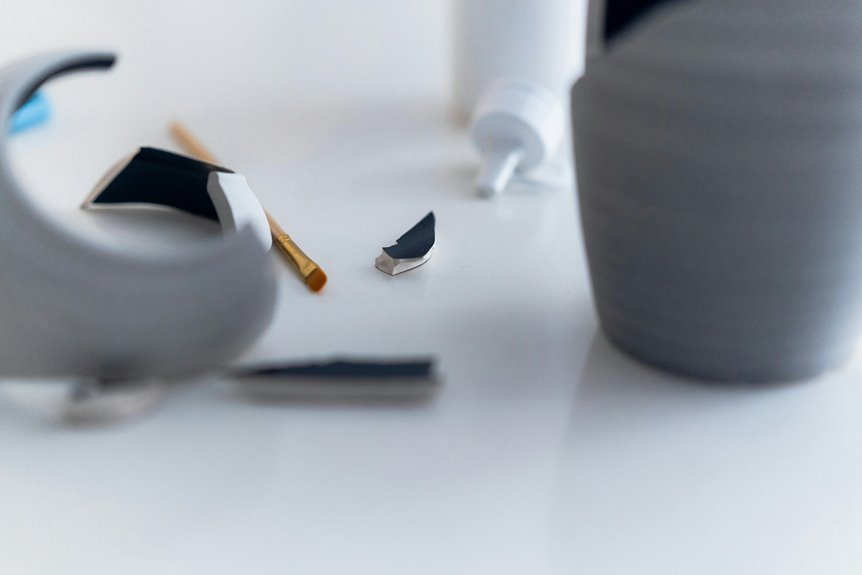
So here’s where the real trouble starts with Gorilla Glue and ceramic: that expansion we talked about doesn’t just happen quietly in the background. It pushes your ceramic pieces apart like an unwelcome dinner guest, throwing off your alignment completely. I’ve seen it happen—you think you’ve got a perfect fit, but then the glue expands and suddenly nothing lines up anymore. That expanding foam also seeps out at the bonding areas, leaving visible residue that makes your ceramic repair look messy. The cleanup becomes a nightmare too, since that hardened foam clings to adjacent surfaces stubbornly. For delicate ceramic work where precision matters, epoxy-based adhesives that don’t expand are your better choice. They’ll give you that clean result you’re after.
Misalignment and Joint Failure
How does a glue that’s supposed to hold your ceramic pieces together actually end up pushing them apart? When you use Gorilla Glue on ceramics, that expansion I mentioned earlier becomes your biggest problem. As it cures, the glue pushes your carefully aligned pieces out of position, creating unwanted gaps at the joint. I’ve seen this happen countless times—you think you’ve got everything lined up perfectly, but then misalignment ruins the whole repair. The expansion also increases seepage risk under tight fits, potentially cracking your ceramic. You’ll need to clean up excess glue quickly during curing, or it’ll smear and crowd the joint further. That’s why I’d recommend epoxy-based adhesives instead. They don’t expand, so your ceramic pieces stay exactly where you want them.
Gorilla Epoxy vs. Standard Formula: Which Works Better?

When you’re trying to fix ceramic, here’s the real difference: standard Gorilla Glue expands as it cures, which can actually push your pieces out of alignment and crack delicate ceramics, while Gorilla Epoxy stays put and won’t cause that frustrating shifting. Gorilla Epoxy fills gaps better than the standard formula—it’s specifically designed to work in those awkward spaces without expanding, giving you stronger, more reliable bonds on ceramic pieces. Plus, the five-minute set time means you’re not waiting around forever, though you’ll still want to clamp things down and prep your surfaces carefully for the best results.

CRAFTSMANSHIP RESTORED: Y'allCanDiy Ceramic Glue is your go-to solution for restoring broken ceramics to their former glory. Designed specifically for pottery, porcelain, and ceramic repair, our high-strength adhesive creates seamless, invisible bonds that stand the test of time, ensuring your cherished items look as good as new. Cap Color May Vary (Blue or White, Same Glue).

【Expert Bonding for Delicate Ceramics】 Don't let a broken heirloom stay in pieces. This professional-grade adhesive is specifically engineered to handle the porous and non-porous surfaces of fine porcelain, bone china, and pottery. It creates a structural bond that effectively fuses broken edges, making it the ultimate solution for restoring cherished vases, statues, and decorative ceramics.
SPECIALIZED CERAMIC GLUE: Specially formulated for ceramics, this ceramic glue creates a crystal-clear, mark-free bond with its transparent, colorless formula, and is ideal for repairing pottery, porcelain, mugs, and more. Both ceramic repairs and crafting projects are a breeze!
Expansion And Cure Time
Why does Gorilla Glue expand while it’s drying—and what does that actually mean for your ceramic fix? Well, here’s the thing: standard Gorilla Glue foams as it cures, which sounds helpful until you’re staring at seepage oozing from your delicate vase’s joints. That expansion can throw tight-fitting pieces out of alignment, no, really. The epoxy variants offer different cure times—some faster, some slower—but they sidestep this expansion problem entirely. I’ve found that if you’re committed to using standard Gorilla Glue anyway, clamping pieces firmly and wiping excess immediately helps. For ceramic work though, epoxy alternatives without that foaming action give you cleaner results and tighter joints. Your repair will benefit from choosing an option suited to the task.
Gap-Filling Performance Comparison
So here’s where things get interesting—when you’re deciding between Gorilla Epoxy and the standard formula, the gap-filling performance is really where they show their true colors. I’ve found that Gorilla Epoxy gives you predictable, controlled results on ceramic pieces, while the standard stuff expands as it cures (which can actually push your delicate joints apart—no, really). Here’s how they stack up:
| Feature | Gorilla Epoxy | Standard Formula |
|---|---|---|
| Gap-Filling | Excellent | Poor |
| Expansion | Minimal | Significant |
| Ceramic Fit | Tight, precise | Misaligned |
| Bond Strength | 3300 psi | Strong |
| Best Use | Delicate repairs | Porous surfaces |
For tight ceramic joints where you need everything staying put, Gorilla Epoxy’s gap-filling formula wins hands down.
When Gorilla Glue Works (and When It Absolutely Doesn’t)

How’s this for the honest truth: Gorilla Glue can work on ceramics, but it’s kind of like using a sledgehammer when you need a scalpel—technically possible, but probably not your best move. I’d reach for it only for decorative pieces you’ll just admire on a shelf, not dishes you’ll actually use. Here’s why: its expansion during curing can push your joints apart and create messy seepage, which throws off those intricate repairs you’re trying to nail. Plus, it yellows over time, and that long cure time tests your patience. For functional ware or detailed ceramic adhesive work, you’ll want something more precise—an epoxy-based alternative gives you better control and gap-filling without the drama.

Anti-clogging cap:Convenient to use without waste

💪 Superior Bonding Power & Reliability: Engineered with advanced formula, our super glue delivers outstanding adhesive strength, securing ceramics and more with a long-lasting hold. No matter if it's daily-use mugs, figurines, or home decoration, you'll enjoy a dependable, permanent fix.

FLEXIBILITY, STRENGTH and BEAUTY: Ease your mind with revolutionary CERAMIC FLEX technology in the most advanced polymeric sand available, allowing flexibility and durability in joints 1/8” up to 4”, with beautiful colors to make your paver or stone surfaces pop!
How to Prep Ceramic Surfaces for the Best Bond

They’re deceptively tricky because not all ceramics are created equal. Here’s what I’ve learned: porous ceramic surfaces need glues designed specifically for them, while vitrified (that’s the super-hard, shiny kind) surfaces demand roughening first. I rough up those vitrified areas to create grip for the adhesive—think sandpaper, not gentle. Then I clean everything thoroughly, because dust and glazing won’t help your bond. For the actual gluing, I reach for epoxy adhesives like Devcon or Gorilla Epoxy over cyanoacrylate glues. They’re stronger and more durable on ceramic. That two-part epoxy creates a tough connection. Before you commit to any repair, test on scrap pieces first. It takes five minutes and saves headaches.

Super Glue for Ceramic and Porcelain repair 25g and earthenware in medium viscosity, transparent, high-temperature adhesive and waterproof for all bondings.

🎨 Restore Craftsmanship with Invisible Bonds: Designed for pottery and porcelain repair, this ceramic glue creates seamless, invisible bonds that restore your cherished items to their original glory. Perfect for mugs, plates, and decorative pieces, it ensures your ceramics look as good as new for years to come.

STRONG ADHESION EASY USE: Fast drying in 10-25 seconds. Oil-based glue does not harden or become brittle over time. Dries without strong smell.
How to Apply Gorilla Glue to Ceramic (Step-by-Step)

Now that you’ve got your ceramic pieces prepped and ready (and they really should be clean and dry, no shortcuts there), it’s time to actually apply the Gorilla Glue and let it work—which means understanding both how to get it on there correctly and what happens during that important curing window. I’ll walk you through the application process step-by-step, covering everything from how much glue to use, where to apply it, and the clamping techniques that’ll keep your pieces from shifting as the adhesive expands and hardens. The good news is that if you follow along carefully, you’ll nail this part and set yourself up for a repair that actually holds.

All-In-One Kit: It includes 2 epoxy glue, a complete set of tools, 20 disposable mixing cups, 10 stirrers, 2 push rods (for precise 1:1 mixing ratio), and 4 gloves. No extra purchases needed—just unbox and start repairing immediately

Multi-Purpose 2-Part Epoxy Putty: This metal filler putty can be used to repair plumbing leaks and pool leaks. As well as holes, cracks, breaks, and uneven surfaces in various materials. The AB epoxy putty filler can be used to repair, fill, and bond metal, plastic, stone, wood, tile, ceramic, acrylic, glass, sculpture, and more.

Easy 2-Part Mixing: Simply mix equal parts of A and B putty until the color becomes uniform. Easy to shape and apply for everyday repair projects
Surface Preparation Steps
Why does preparation matter so much before you even open that bottle of glue? Well, I’ll tell you—it’s the difference between a bond that lasts and one that fails.
You’ll want to clean your ceramic pieces thoroughly, removing dust and oils that’ll sabotage your adhesion. For vitrified surfaces, I roughen them slightly with sandpaper, which gives the glue something to grip onto. It works.
| Step | Action | Why It Works |
|---|---|---|
| 1 | Clean with mild soap and water | Removes contaminants |
| 2 | Dry completely | Prevents weak bonds |
| 3 | Lightly sand vitrified surfaces | Improves adhesion |
| 4 | Inspect for debris | Maintains clean contact |
| 5 | Position pieces for clamping | Prepares for gluing |
Taking these moments upfront means you’re setting yourself up for success—and that’s what we’re all after.
Application And Curing Process
Once your ceramic pieces are prepped and ready to go, you’re in the home stretch—it’s time to actually apply the glue and let it work.
- Squeeze out equal parts from the two-part epoxy syringe onto a mixing surface
- Stir thoroughly for about one minute until the mixture turns uniform in color
- Apply the epoxy to both ceramic surfaces with a small brush or applicator
- Press pieces together firmly, then clamp them tight to prevent shifting
The epoxy sets quickly—around five minutes—but you’ll want those clamps staying put for the full curing time, which takes considerably longer. The bond expands slightly as it hardens, so keeping everything locked down prevents messy squeeze-out and misalignment. Patience matters here. Once fully cured, you have a durable, gap-filling repair that will hold strong.
Why Repaired Ceramics Aren’t Safe for Eating

Can you really eat off a ceramic mug you’ve glued back together? Here’s the thing—I wouldn’t recommend it. When you use glue on ceramics, those adhesives can leach chemicals into your food or drinks, which isn’t exactly what you want in your morning coffee. Even if the bond looks solid on the outside, the inside might harbor sneaky micro-cracks or adhesive residues that pose contamination risks. No, really—it’s not worth the gamble. The safest move? Treat repaired ceramics as decoration only, not for eating or drinking. If you absolutely must repair something functional, make sure the glue only touches non-food areas. When in doubt, replace the item or chat with a professional. Your health’s worth it.

NO-DRIP GEL FOR BROKEN HANDLES, EDGES & FIGURINES: Thick formula stays in place on vertical and overhead ceramic surfaces – reattach mug handles, fix chipped plate rims, restore broken pottery pieces, and bond porcelain figurines without the glue running down the surface.

Versatile Adhesive: This one-component, moisture curing adhesive provides excellent bonding to many common materials.

Versatile Adhesive: This one-component, moisture curing adhesive provides excellent bonding to many common materials.
Why 2-Part Epoxy Works Better for Ceramic Repairs

If you’ve ever tried regular glue on a broken ceramic plate and watched it fail spectacularly, you’re not alone—but here’s the good news: two-part epoxy is a reliable solution. When you mix those two components together, a chemical reaction occurs:
- Chemical bonding creates strong joints that won’t budge
- Gap-filling properties work on uneven ceramic breaks
- High shear strength means your repairs hold up during daily use
- Works on both porous and smooth ceramic surfaces when properly prepped
Epoxy changes ceramic repairs from “hopefully this lasts a week” to “I can actually use this plate again.” Brands like JB Weld and Devcon have earned their reputation because they deliver real, lasting results. Your broken ceramics deserve better than crossed fingers—they deserve epoxy.

PROFESSIONAL CERAMIC REPAIR MADE EASY: Restore your favorite ceramic items with ease using our Ceramic Glue. Designed for pottery, porcelain, and more, it delivers smooth, invisible bonds that bring back the beauty of your cups, vases, plates, and keepsakes.

FLOWS INTO HAIRLINE CRACKS IN CERAMIC & PORCELAIN: Ultra-thin formula wicks deep into fractures that are barely visible — penetrates and bonds from the inside out by capillary action. Restores structural integrity on cracked mugs, plates, bowls, and porcelain pieces without any surface buildup.

CERAMIC-SPECIFIC: This ceramic-specific strong adhesive is suitable for repairing mugs, plates, porcelain ornaments, vases and pottery. It can form a durable and firm bond on the ceramic surface, ensuring that damaged items are securely repaired.
5 Mistakes That Ruin Ceramic Repairs

Why do so many ceramic repairs fail just when you think they’re finally fixed? I’ve learned the hard way that common mistakes wreck even the best intentions. Let me share what I’ve discovered about keeping your ceramics intact.
| Mistake | Why It Fails | Better Choice |
|---|---|---|
| Using Gorilla Glue | Expansion causes gaps and misalignment | Epoxy or ceramic adhesive |
| Skipping test runs | You won’t know how it’ll react | Test on scrap pieces first |
| Ignoring surface prep | Dirty surfaces weaken bonds | Clean and dry thoroughly |
I’ve realized that Gorilla Glue’s expanding formula pushes pieces apart on delicate ceramics. Epoxy gives you tighter joints without messy seepage. Testing beforehand? Not optional. You’ll achieve successful repairs by respecting these fundamentals.

Anti-clogging cap:Convenient to use without waste
Strong Ceramic Bonding: Ceramic glue adhesive provides durable and reliable bonds for ceramic repair; ideal for fixing mugs, tiles, figurines, and kitchenware

When to Call a Professional Restorer Instead

- Antiques or sentimental pieces that matter deeply to you
- Delicate items where wrong pressure or heat could cause more damage
- Valuable ceramics requiring invisible repairs that preserve authenticity
- Pieces you’re unsure about restoring safely yourself
A professional can assess risks you might miss, choose adhesives that work well, and guide restoration techniques that protect structural integrity. They’ll advise you on kiln-repair options or safe repurposing if your piece can’t be secured. Getting an expert quote helps determine what’s best for your ceramic.

Dimensions (in inches): 6 H x 6 W x 1/4 D

High Temperature Resistance – Withstands up to 150°C;forms strong waterproof,moisture-proof bonds that stay firm under continuous high temperature
15-45 SECOND INITIAL BOND — PRESS & HOLD: Delyoisy ceramic glue achieves initial set in 15-45 seconds after application. Press firmly and hold for the specified time. The bond will hold parts in place immediately, but allow 24 hours for full cure before handling or exposing to water. Proper curing ensures maximum bond strength and durability for your ceramic repairs.


